Acquisition of New Material
To streamline the process of registering new germplasm in GGCE, the Acquisition tool within the Inventory menu should be utilized instead of manually registering each item.
On smaller screens, the application menu can be opened by clicking the GGCE logo.
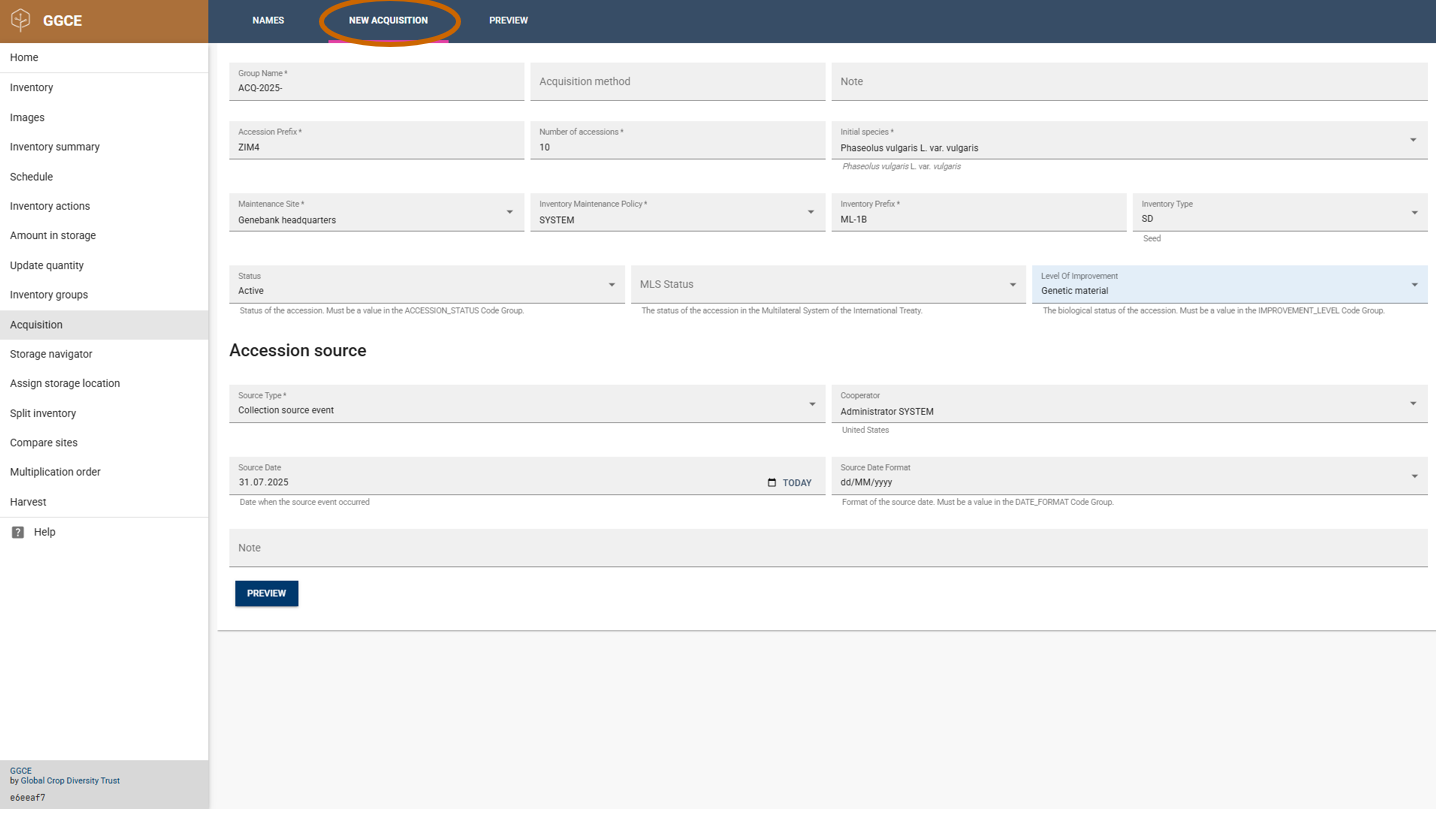
Once in the Inventory section, select the Acquisition menu option. Then, click the New Acquisition link on the banner to display the form.
Fill in the Form
Group Name indicates to which inventory group all the new inventory items should be added. This field is required and is useful for identifying this batch of germplasm.
Accession Prefix is the prefix of the accession number for all entries. Type in INTRO.
Number of Accessions is the number of accessions that should be added to GGCE. Type in 2
Select an entry in Initial Species by typing part of the scientific name. Type in Oryza and GGCE will then display the top 10 matching taxa. Select one of the available options - the selected taxon will be assigned to all the samples.
The next four fields deal with the inventory information for all samples in this batch. Maintenance Site can be used to set the site responsible for the maintenance of the samples. Select the Inventory Management Policy that will apply to all samples. Inventory Prefix will be prepended to all inventory numbers, and Inventory Type will record the type of all the inventory items; this type code will be appended to the inventory numbers.
The Accession source section sets the source for all samples. Select "collected" in the Source Type field. Enter the current data into the Source Date field.
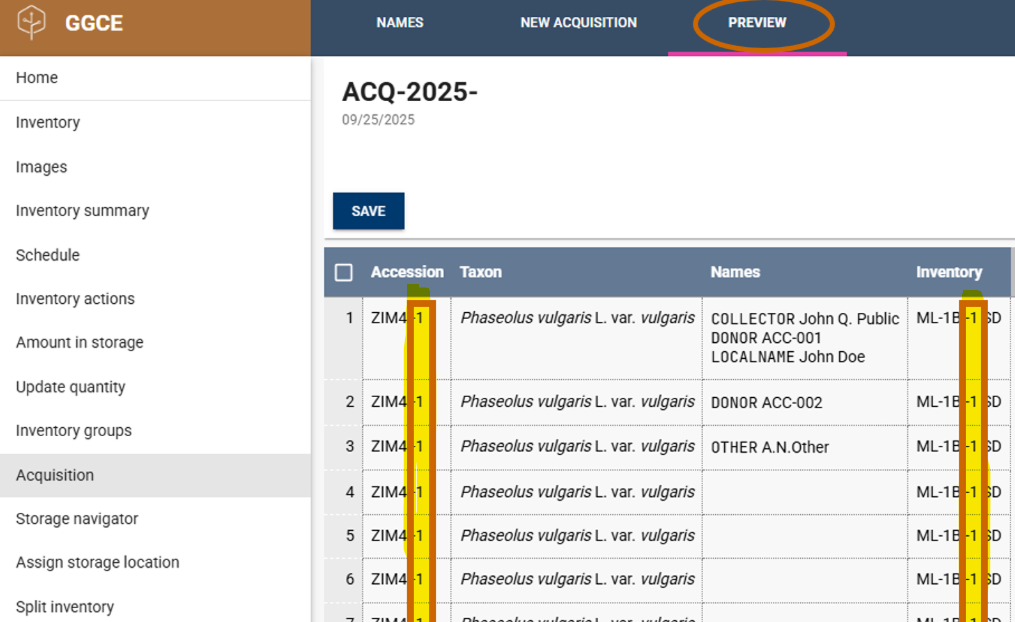
Click the Preview button to display and review the list of new inventory items. At this stage, permanent numbers have not yet been assigned, so the Preview window will display "-1" in place of these numbers.
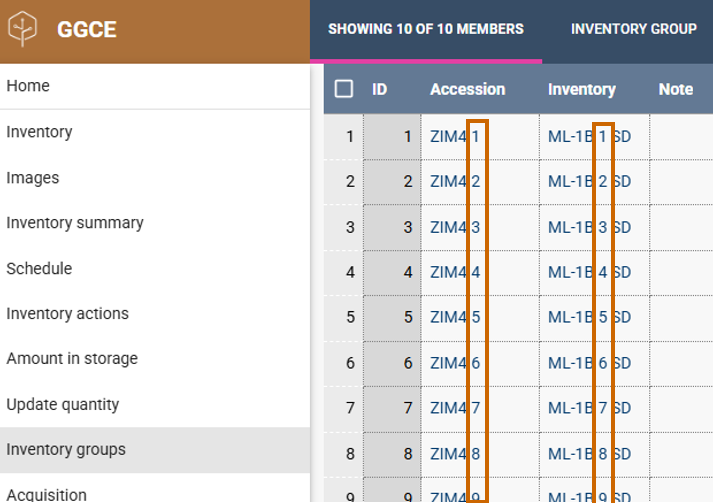
Once satisfied, click Save. This action will create the specified number of new inventory records, each with a corresponding new accession record. When specified, these records will also be added to the specified Inventory group.
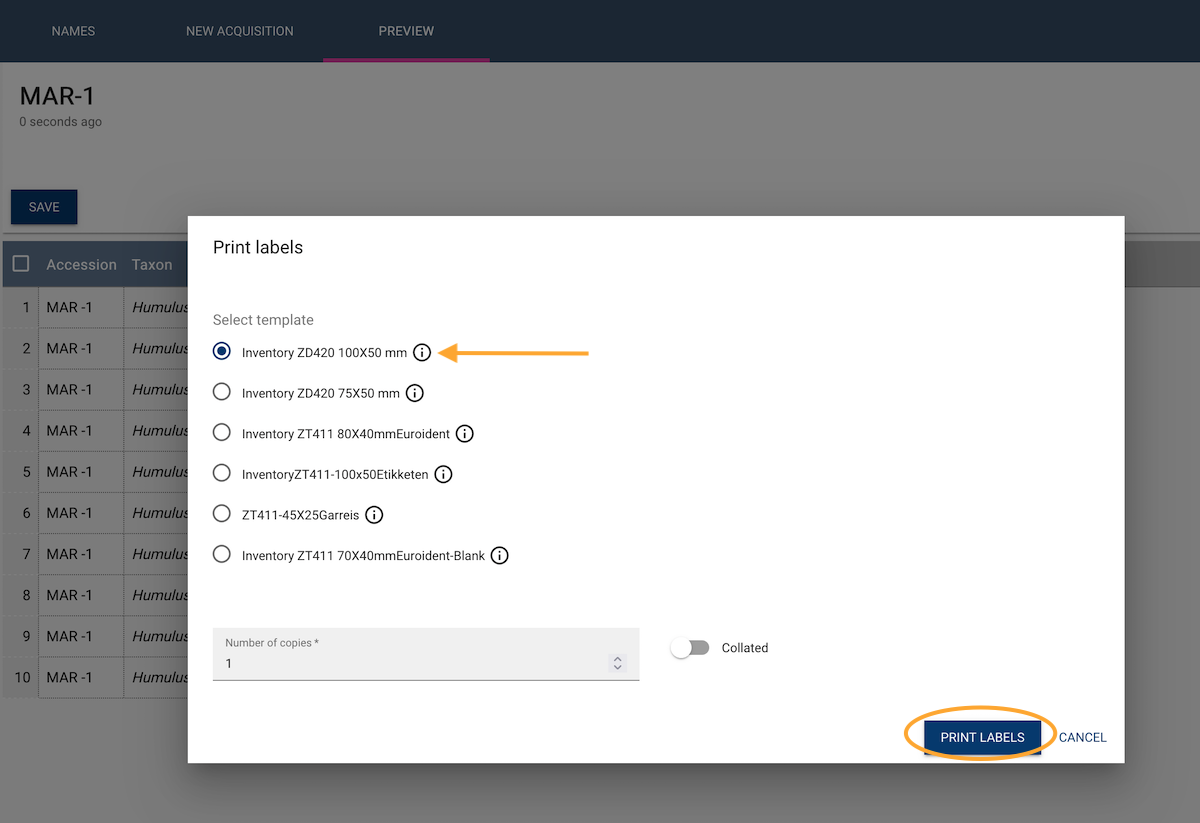
Before printing labels for the new material, ensure that the Label Printer app is installed.
A dialog prompt will appear, offering the option to print labels for the new material, enabling immediate creation and application of labels to the material.