Inventory groups
Inventories and accessions can be grouped into inventory groups. Users determine the purpose of each group. A common use-case is to register collection subsets (e.g. core collections).
Think of inventory groups as shortcuts that allow you to quickly display a list of inventories or accessions for reviewing or further processing. Usually, these groups share a commonality – maybe a specific donor, or perhaps the inventory samples were grown in a specific monitored area. Frequently, inventory groups are established to avoid repeating previous searches. Groups may be kept permanently or deleted once they are no longer useful.
It is important to note that although these are referred to as "inventory groups", accessions can also be included within a group. This is possible because every accession has its own system inventory record. Therefore, when you include an accession in a group, you are referencing the accession's system inventory record, which points to the accession rather than a specific inventory item.
Any accession or inventory item can be included in more than one group.
Creating a new inventory group
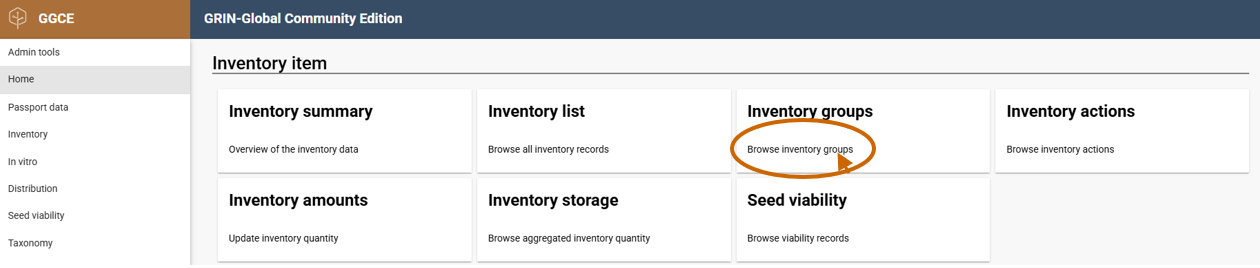
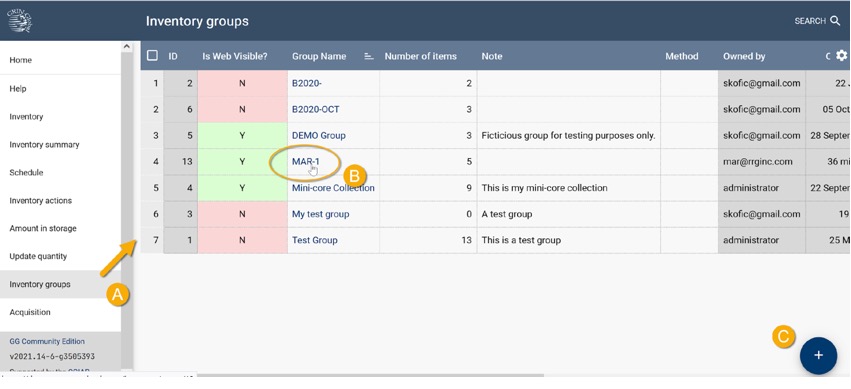
To create a new inventory group, locate the Inventory groups button in the main home window. A link to Inventory groups is also available when the Inventory menu is open in the left pane.
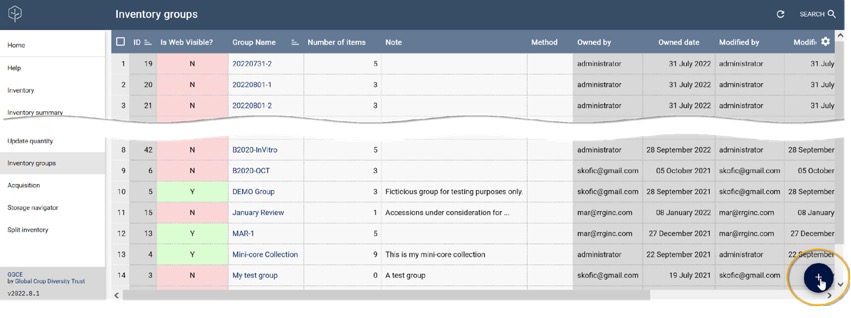
On selecting Inventory groups, a grid listing all the existing groups is displayed. To add a new group, click the Add (+) button at the bottom right of the window.
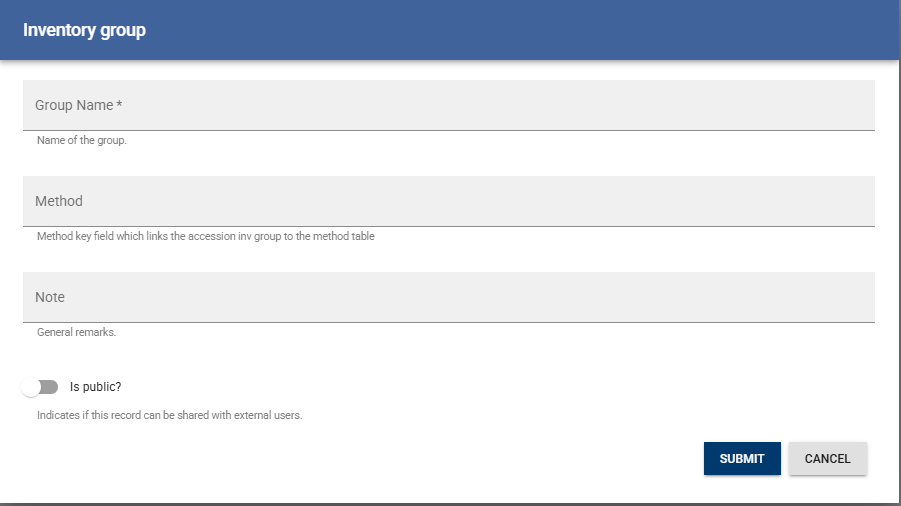
In the resulting Inventory group form, only the Group Name field is required. There are also optional fields such as Method and Note, which are particularly useful when you want to document the rationale for creating the group or explaining its intended use. The Is Public? switch is present but has no effect (yet) in GGCE.
Adding items to an inventory group
To add items to an inventory group, first display the Inventory groups list from either the Home window or the Inventory window. Click on the Group Name of the item you wish to modify.
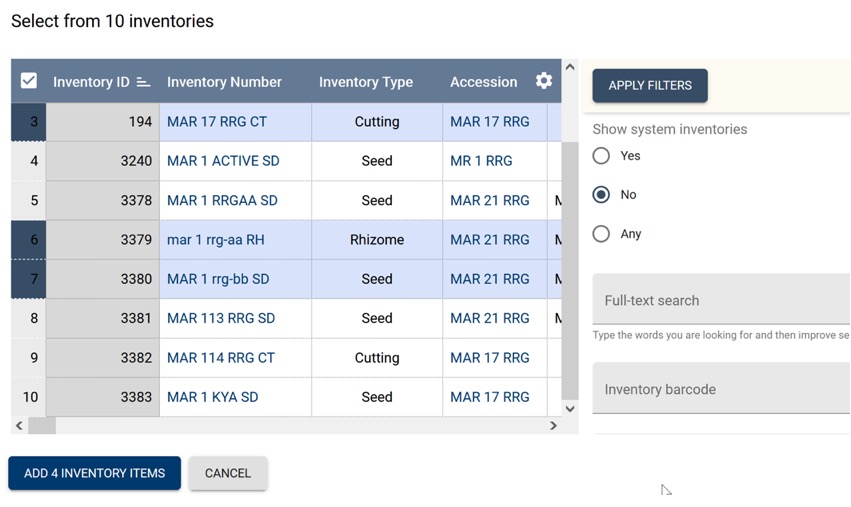
Next, click the Add (+) button. You will be prompted to indicate whether you are adding items by inventory or by accession.
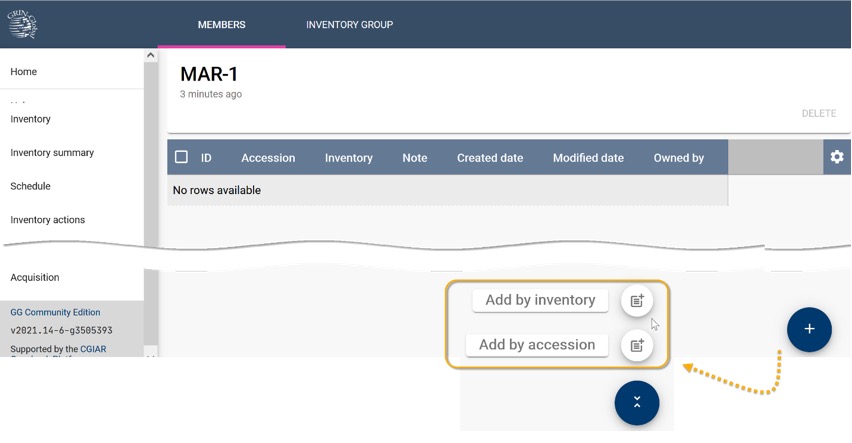
Regardless of the choice, the list that displays can be filtered to control what items appear. You can then select individual items, or all items, as desired.
After making your selections, click the Add # Inventory Items or Add # Accession Items button to complete the process.