Inventory details
When reviewing an inventory item's details, click any tab in the banner to navigate to other inventory-related data.

Actions
This tab lists all actions related to the selected inventory item and allows you to quickly schedule new actions or log any past activities.
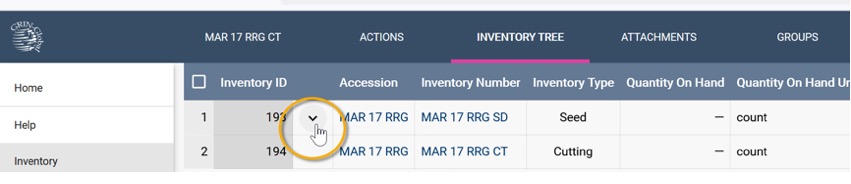
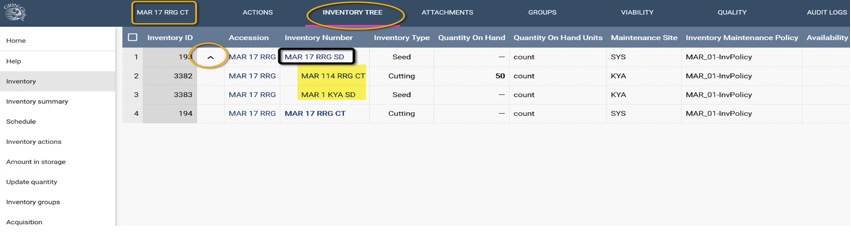
Inventory Tree
Selecting the Inventory tree tab while viewing a specific inventory record enables you to list inventories for the same accession. A down arrow symbol indicates that the list can be expanded, allowing you to determine the parentage of the inventory.

Attachments
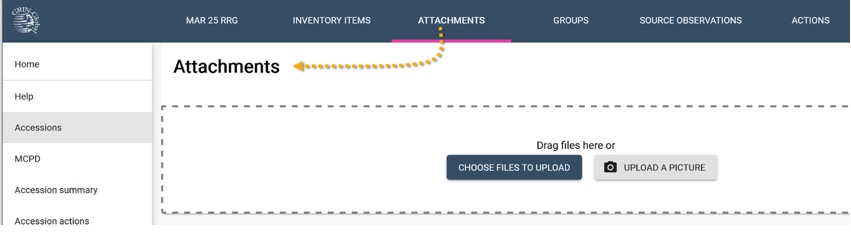
The Attachments section is used to add and view documents and images linked to the accession. You can store a wide variety of files within GGCE – photos, other images, PDFs, Word files, Excel files, etc.
More on attachments in Attachments documentation.
Adding attachments
The Attachments option is accessible from two different windows: the Accessions details page and the Inventory details page. All attachments are always associated with an inventory record. If a file is attached via the accession window, it is linked to that accession's system inventory record. It is important to note that a system inventory record does not represent a physical lot but serves as a means to connect data to the accession via an inventory record. Any data connected with a system inventory record is considered to apply to the accession as a whole, rather than to a specific inventory lot.
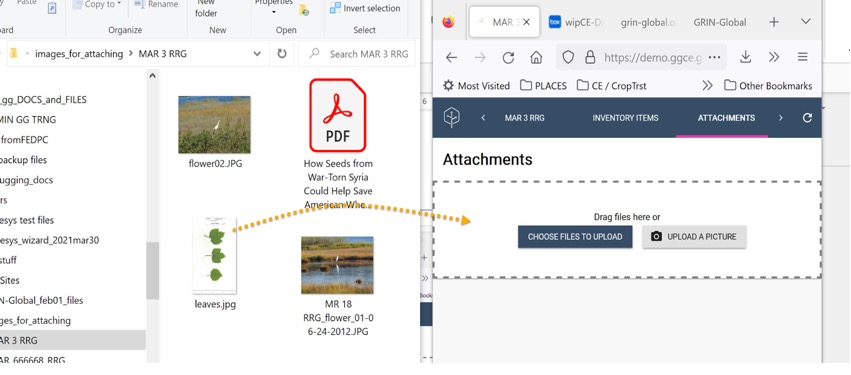
Images attached to a record will display as smaller "image thumbnails" in the attachment window. Other file types, such as PDFs and other documents, will be listed and can be downloaded at any time.
The Attachments window indicates several options for uploading files. You can click on either of the two buttons: Choose Files to Upload or Upload a Picture. Both buttons function similarly, but the Upload a Picture button defaults to filtering for image files.
When selecting multiple files, you can use the CTRL or SHIFT keys as needed, and click Open when ready to attach.
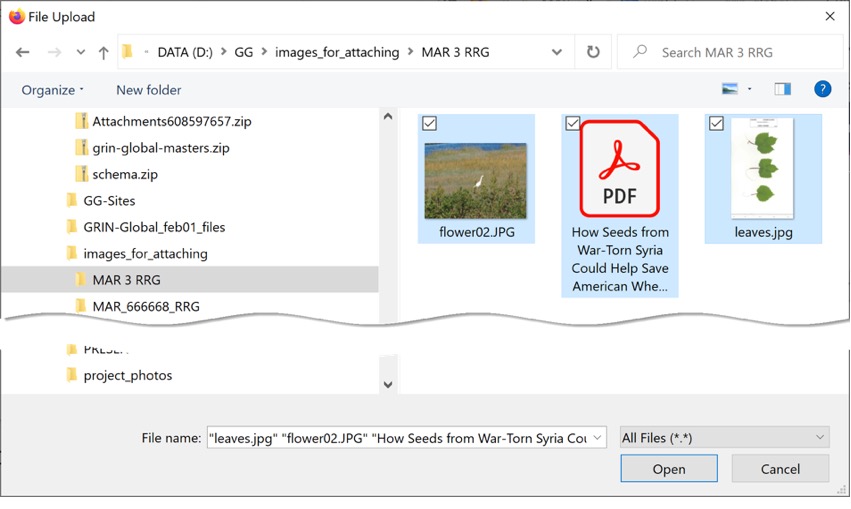
Alternatively, files can be dragged directly from any file browser on your computer to the highlighted area of the Attachment window. You may find it easier to reduce the size of your window on the screen so that both the file browser and the Attachment window are visible side by side.
Removing attachments
To remove attachments, locate the relevant request and click the Attachments button in the banner. In the Files (attachments) grid, select any attachment items to be removed; click the action button in the lower right corner and select Remove.
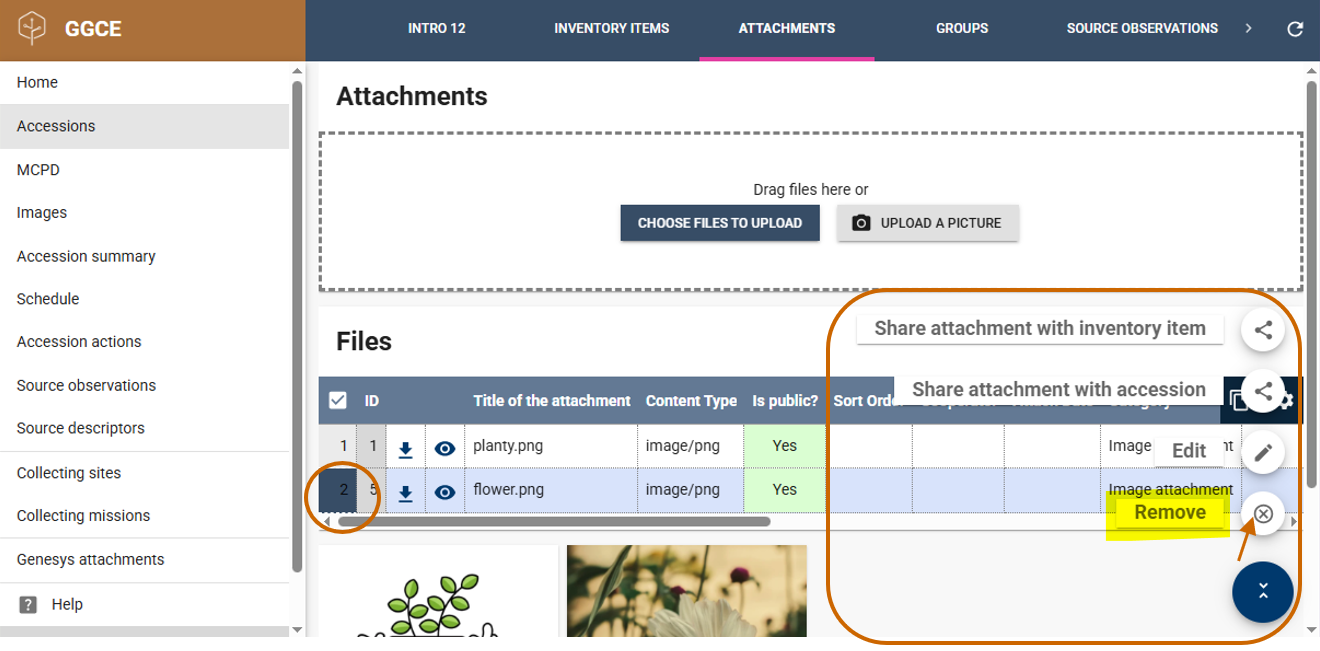
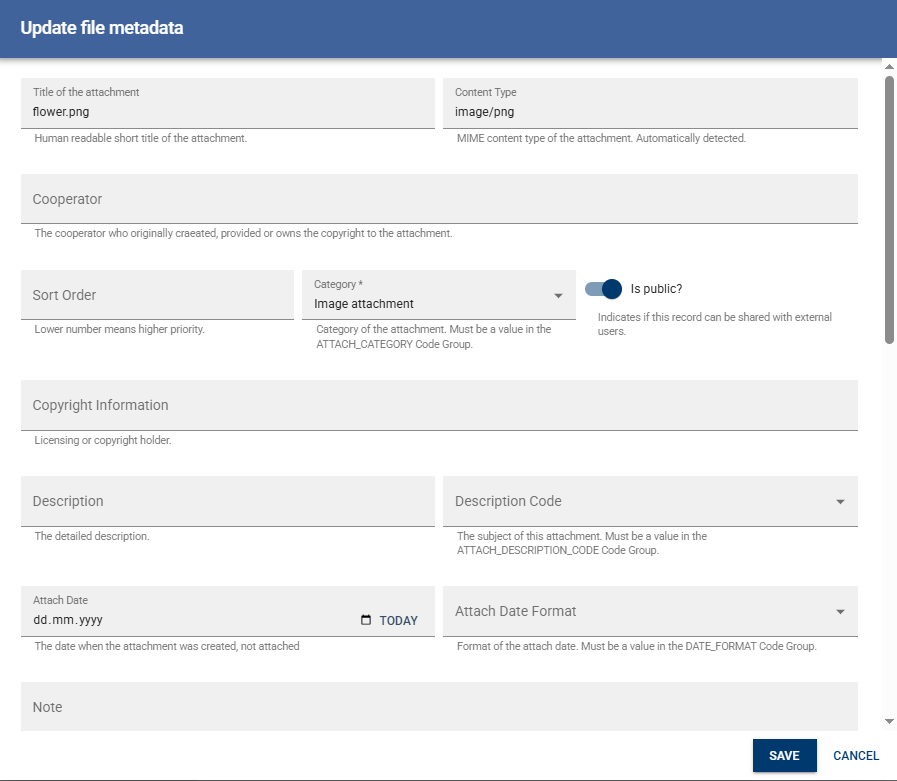
Editing the attachments
GGCE automatically fills in many fields in the attachment form, but you can always edit these fields or fill in additional information as needed.
To edit an attachment, locate the request and click the Attachments button in the banner. In the Files (attachments) grid, select one attachment item to be edited, click the action button in the lower right corner and select Edit to display the form.
Viability
When the Viability tab is selected in the banner, users see all the viability records of the inventory. These records include key details such as Status (whether the test is completed or pending), Percentage Viable, and other relevant information essential for monitoring inventory viability.

Clicking on the Tested Date column link of an inventory record allows you to view a breakdown of the viability data for a specific test, with options to: (1) add attachments and create inventory viability actions from the tabs in the banner; or (2) remove, generate labels, cancel, or complete the viability test.
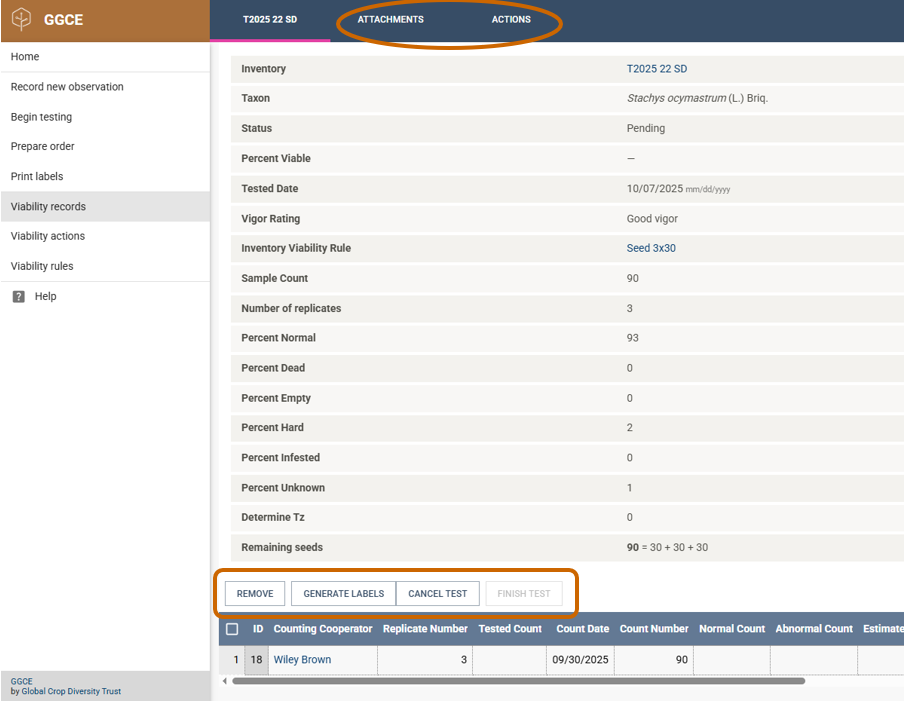
Detailed procedures for conducting viability tests, as well as the proper methods for recording new observations, printing labels, creating viability actions, etc. are outlined in detail within the Seed viability documentation.
Quality
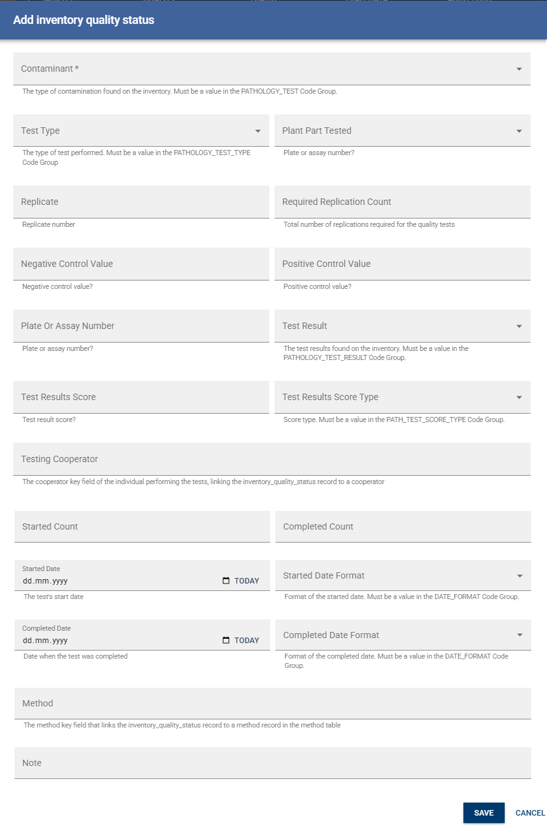
Whenever pathogen or other quality tests are conducted, the resulting data should be stored using the Add inventory quality status form. This form can record individual test results or summary results from a group of tests.
Many fields in the form use dropdown menus, where the items in the dropdown list are codes. As with other dropdown fields within GGCE, if a required code is missing or needs to be edited, contact your administrator.
There are five dropdowns used by the Add inventory quality status form. These dropdowns use codes stored in the code groups maintained by your GGCE administrator.
- PATHOLOGY_TEST
- PATHOLOGY_TEST_TYPE
- GERMPLASM_FORM
- PATHOLOGY_TEST_RESULT
- PATHOLOGY_TEST_SCORE_TYPE
These two fields are mandatory:
- Test Type (uses the PATHOLOGY_TEST_TYPE code group)
- Contaminant (uses the PATHOLOGY_TEST code group)
If any pathology-test related codes are missing from the database, contact your GGCE administrator to have them included.
Traits
TBD
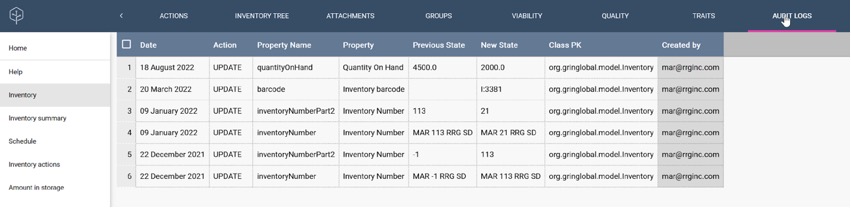
Audit Logs
When displaying an inventory item's details page, clicking the Audit Logs tab in the banner displays any database-level changes made to that inventory item's data. This includes information about the field that was changed, the previous and updated values, who made the changes, and the date on which the change occurred.