Grids (tables/lists)
Here, Inventory has been selected on the menu on the left and a list of inventory items is displayed in a grid on the right.
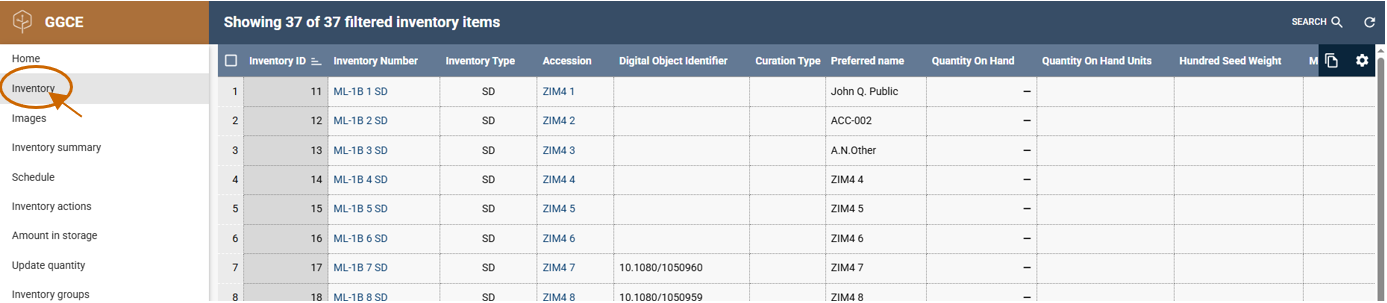
GGCE grids are generally lists of items (records). Each list displays data in columns; the example used here is Inventory. In most GGCE lists, many columns comprise the view. To view all columns, it is often necessary to use the window’s bottom scroll bar to scroll back and forth. However, you have several ways to control the window’s display.
Grid gear icon
The grid window has a gear icon near the top right that enables some customization of the columns.

By clicking this gear icon, you can choose to hide or show individual columns, wrap the table cell text, bold the text, or adjust the text alignment (left, center, or right).

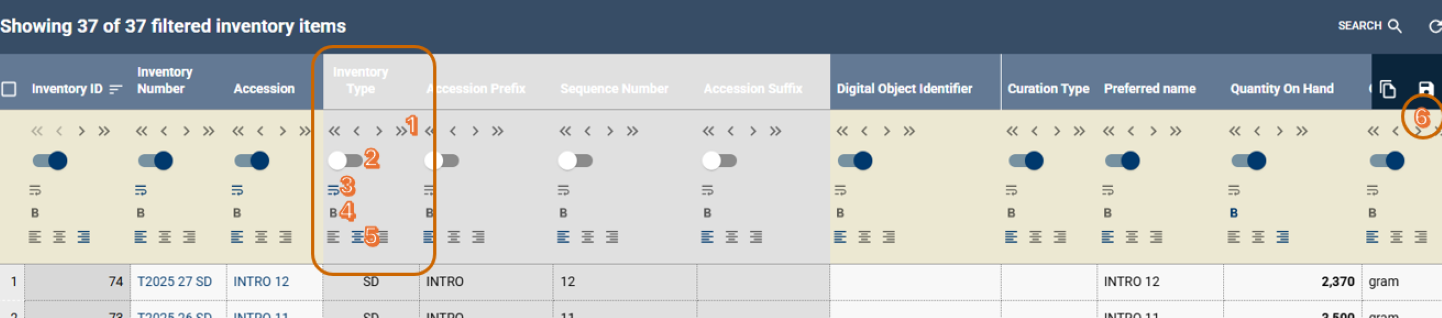
In the example below, the controls used for managing the appearance and behavior of the Inventory Type column within the grid are: (1) Directional arrows to move the column right (these enable you to move a column either all the way to the far left or right or simply shift one position at a time); (2) Hide column (by toggling the switch to the left, you can hide the selected column from view); (3) Enable text wrapping of both the heading and data; (4) Display data in bold; (5) Center the text (with options to align the text to the left or right as needed); and (6) Save icon.
After making changes, the Save icon appears in place of the Gear icon in the top-right corner. Clicking the Save icon stores your customized grid settings.
Adjusting column width and order
You can manually adjust the widths of columns by clicking near the top of the column and then dragging the cursor left or right. To change the order of columns, simply click on a column heading and drag it to your preferred position before releasing.
Sorting and selecting records in the grid
A Sort icon can be clicked to toggle between ascending to descending order. In the example below, the records are listed in descending order by the Inventory ID column.
Each grid has a select checkbox at the top left, enabling you to select or deselect all rows at once. Alternatively, you can manually select individual rows by clicking on the row numbers to the left of each row.
Once the items have been selected, the action button at the bottom right transforms into a menu or "hamburger" icon.
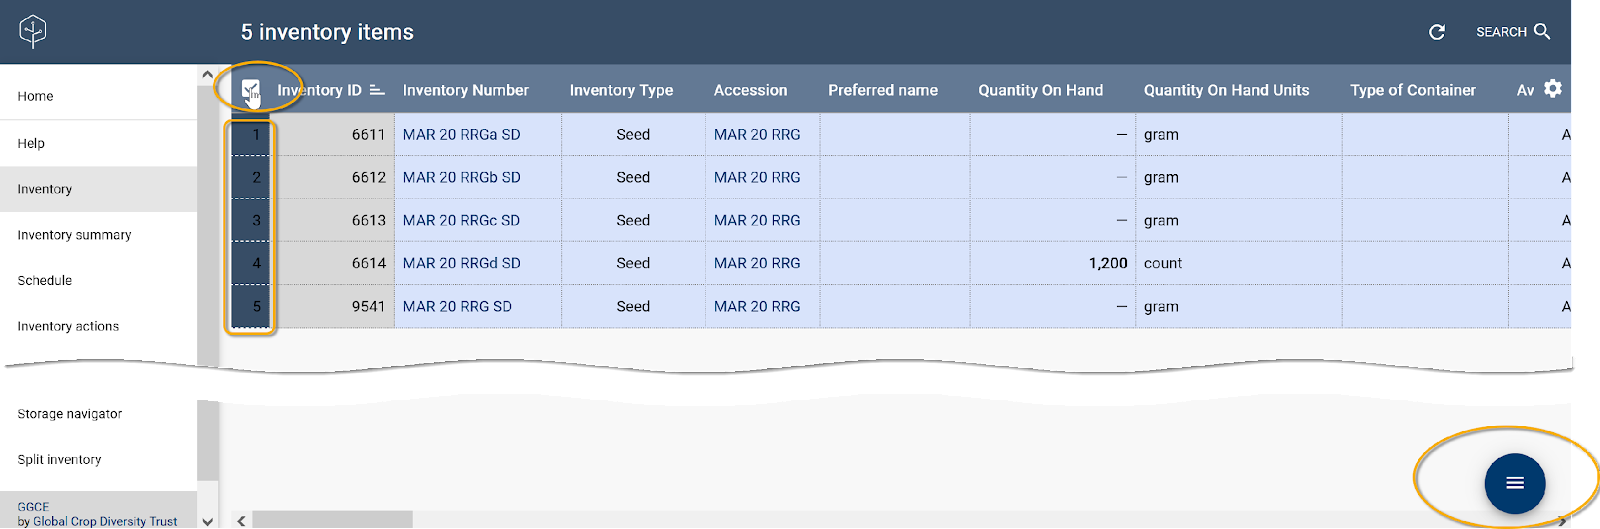
Tapping this button reveals a list of possible actions that can then be applied to the selected items.
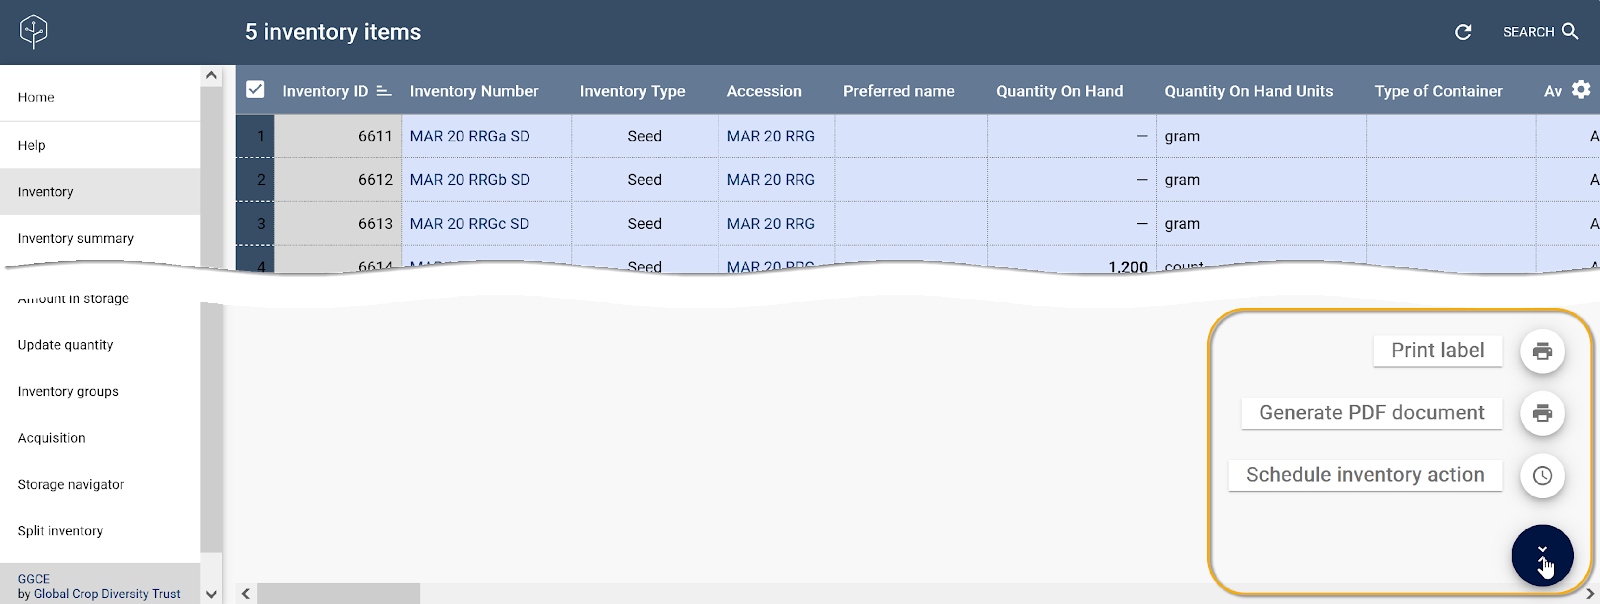
GGCE’s grids all typically behave this way: you select items in the grid, and then you can choose an action to apply to your selections, which will vary depending on the current grid.
The action buttons at the bottom right of the grid provide access to these options. In some instances, the action button represents a single action. More commonly, however, the action button is represented by a hamburger icon; clicking this icon reveals a list of all available actions.
Opening a form for an existing record
Within a grid, links are provided in one or more columns. Regardless of which column the link is in, clicking on an item’s link will typically display a related form for that item.
In the following example, an accession list is displayed. Clicking the accession number opens that accession’s related form, partially shown here.
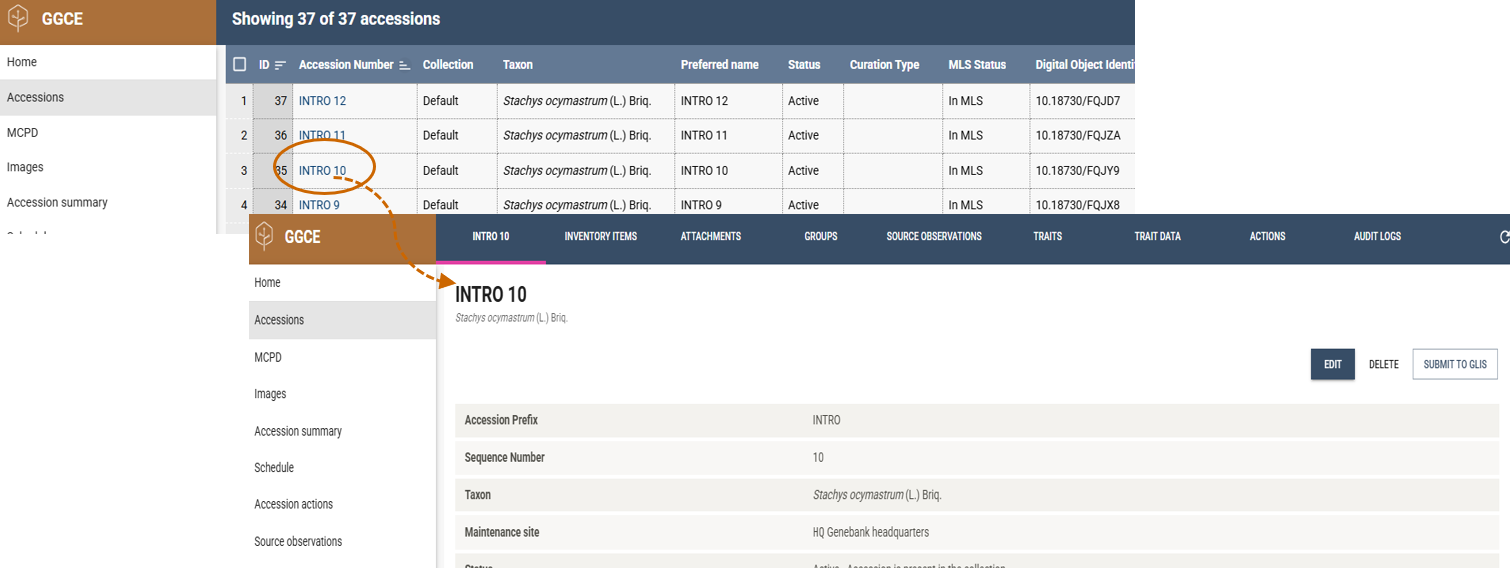
Note that these forms typically feature clickable options in the top banner for the selected item. In this case, after opening the corresponding accession, the user has the option of clicking on Inventory items to display this accession’s related inventory items.

Adding data
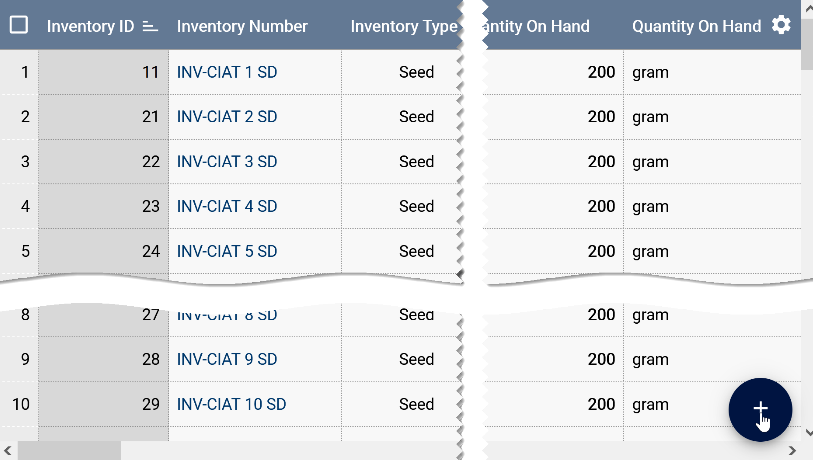
To add data to GGCE, regardless of the item type – accession, inventory item, passport data, or crop trait – you must be on the related screen where the data is displayed in a grid format.
From the heading in the example below, you can see that these are Inventory items. Typically, when the grid is displayed and no items are selected, a large Add button with a plus (+) icon appears in the screen’s lower right corner. Click this button to start adding a new item.
When the Add button is not visible
In some cases, when no items are selected, instead of the Add (plus icon) button, a "hamburger" button may be displayed instead. Clicking the "hamburger" button displays a list of options above it, relevant to the current window. You can then proceed by choosing one of these options.
Completing GGCE forms
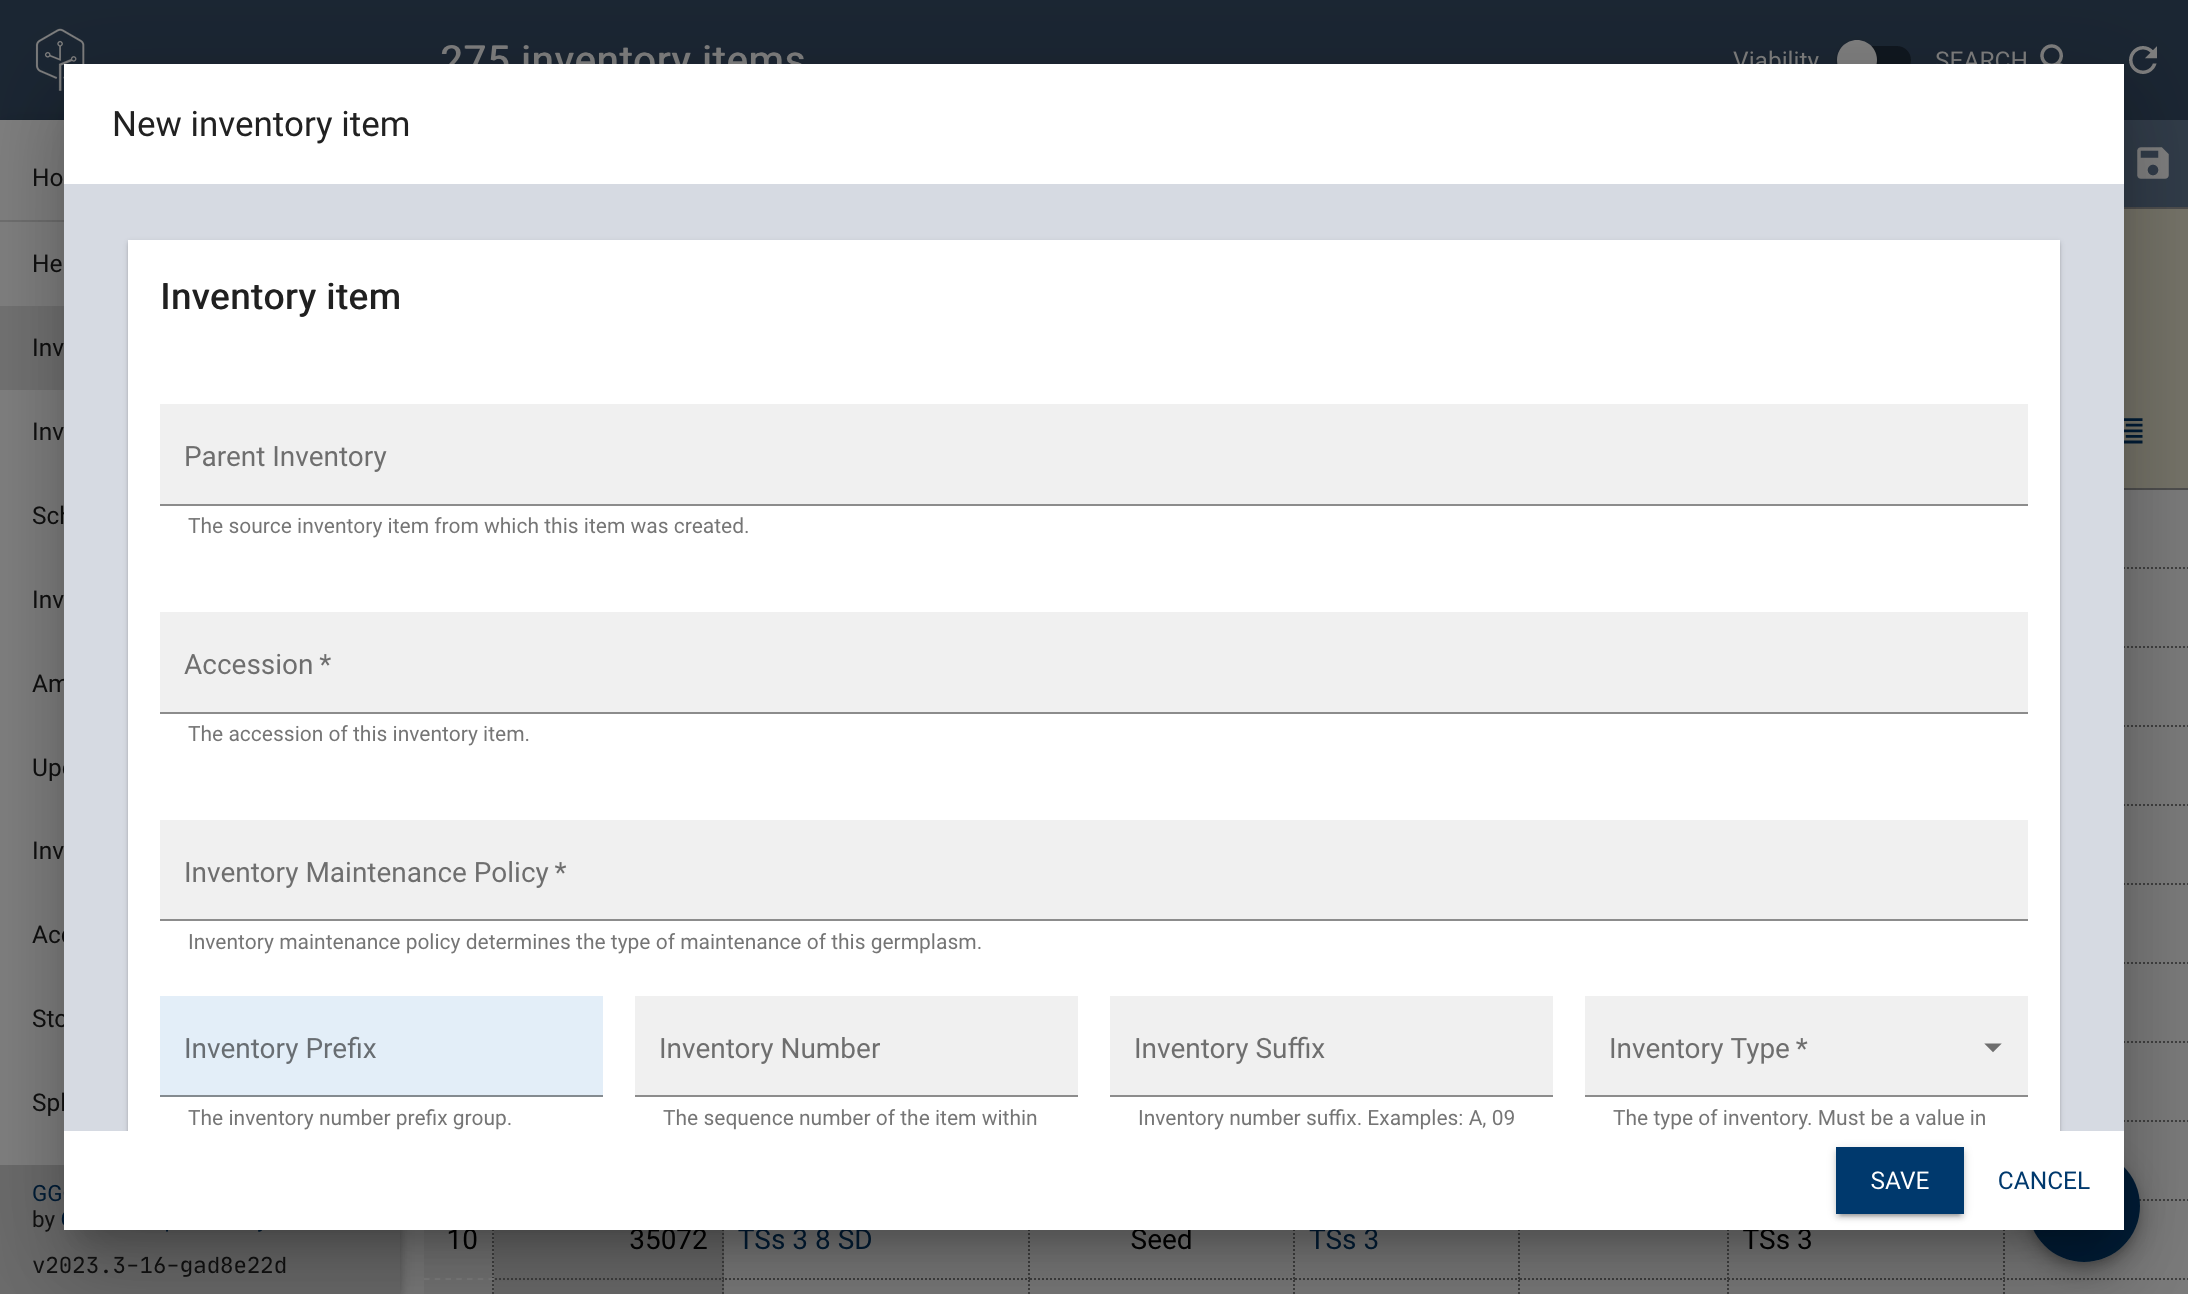
After clicking the Add button, a form for entering new data is displayed. GGCE forms are designed to retrieve existing data when applicable. For example, when creating an inventory item, you must select an existing accession. As you begin typing an accession number, a list pops up allowing you to select an existing accession.
All mandatory (required) fields – typically marked with an asterisk (*) – must be filled in before you can save the form. When you are finished entering data, click the Save button in the form’s lower right corner to save the new record in the database and proceed.
Switches on forms
Switches are commonly used in GGCE to represent specific conditions. If the switch is to the right and brightly colored, it indicates “Yes”; to the left and grey, it indicates “No”. Almost always, the switch’s label is displayed as a question, as shown below. To change the setting, click on the icon or the text.
Of the three sample switches shown below, the middle one is set to No – indicating this accession is not backed up.

Returning to the grid from a form
To return to the grid from within a form, you can either click the Cancel button or click anywhere outside the form dialog. Alternatively, if the previous screen was a list, using the browser’s back button will also return you to the list grid.
Deleting records
Data is saved in GGCE as records in the database’s tables. To delete a data record, first navigate to the appropriate menu option in the left pane. For instance, in this example, to delete an accession record, find the record and click on its Accession Number field to open its form.
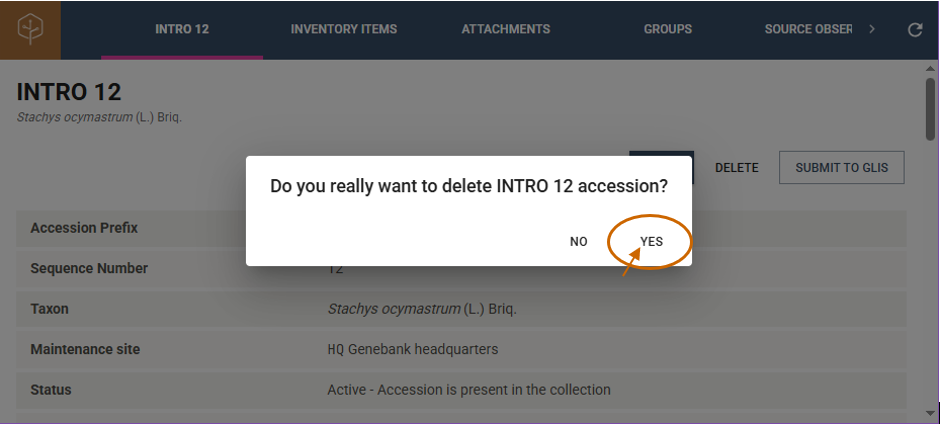
After confirming you have the correct record, click the Delete button.
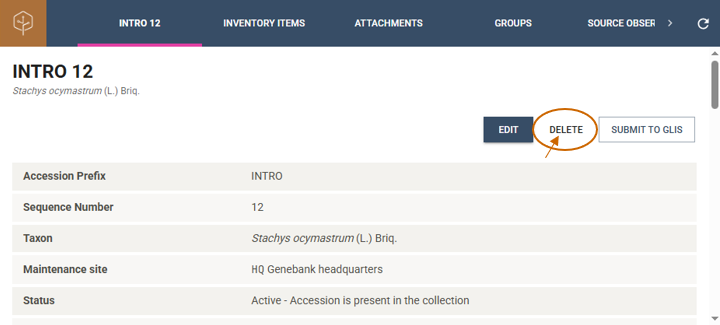
A prompt will appear to confirm the deletion. Once confirmed, the record is permanently removed from the database; this action cannot be undone!
If a record has related “child” records, it cannot be deleted until those child records are deleted first.
Although the example above uses an accession record, accession records are rarely deleted. Even if the germplasm is no longer managed by your genebank, it is recommended to retain the record for reference. You may instead record an action “Archived” to indicate that the accession was archived.