Generating documents
GGCE supports creation of PDF documents from records in your database.
In accession details

Inventory grid

or Distribution

Document templates
Templates are designed using the community edition of Jasper Reports Studio.
Register GGCE data model
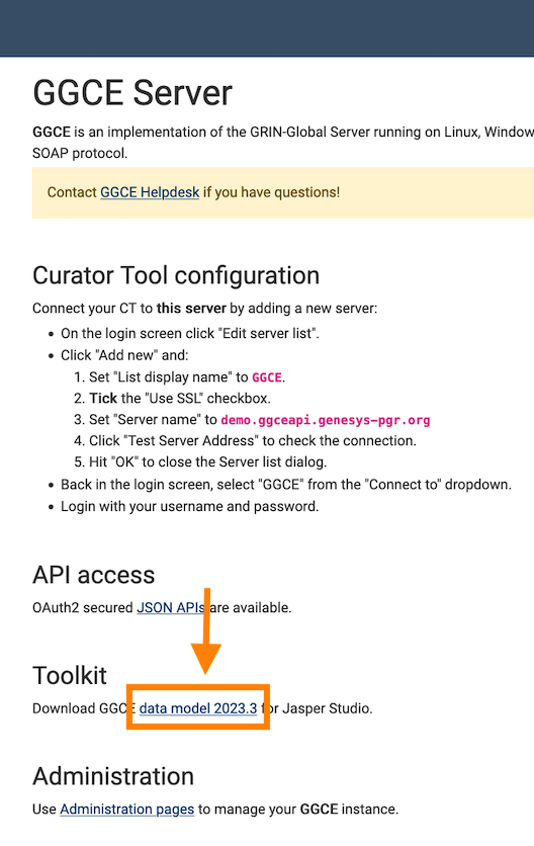
First download the GGCE data model for Jasper Reports Studio. The file is available on your GGCE API server (e.g. on https://demo.ggceapi.genesys-pgr.org) as Download GGCE data model for Jasper Studio.
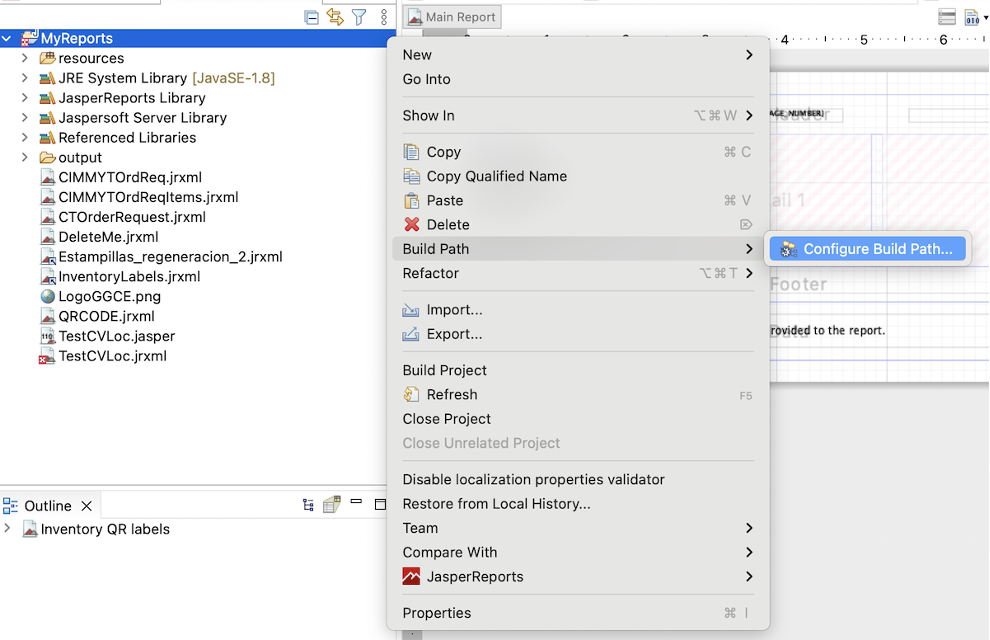
Open Jasper Reports Studio. Under the Project tab, right click on MyReports, go to Build Path and then Configure Build Path.
Select the Libraries tab and the Classpath group on this tab. Click on the button Add External JARs… and look for the ggce-model-VERSION.jar file.
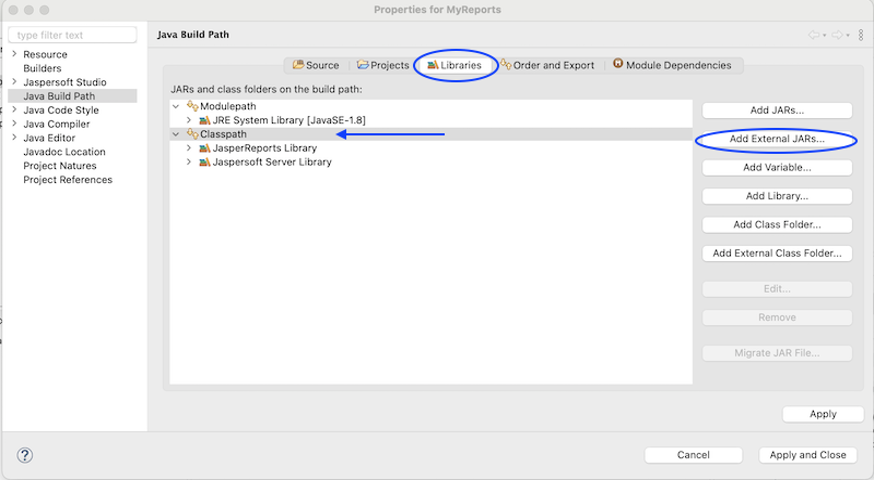
To verify that the file was added to the Classpath, check that the ggce-model-VERSION.jar file appears under the Classpath group.
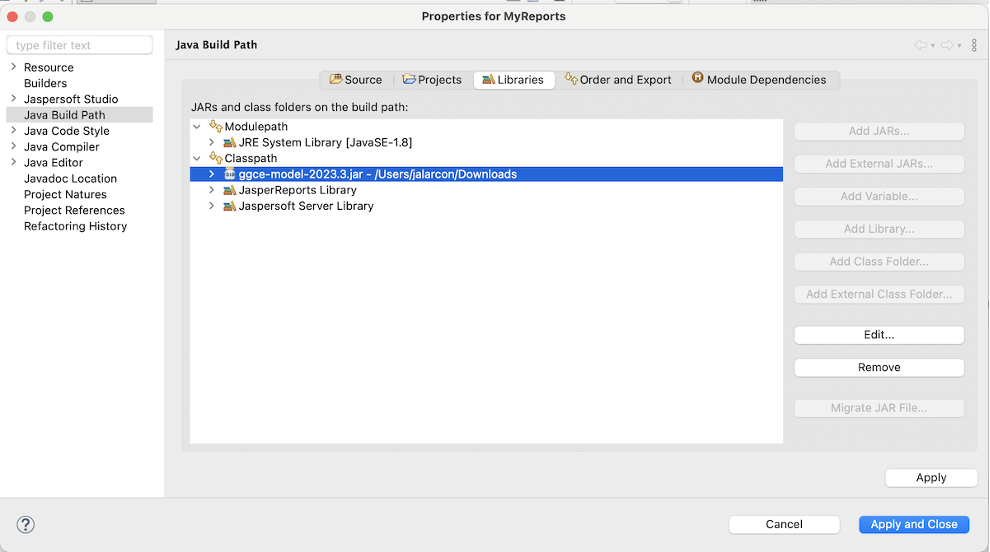
Click the Apply and Close button.
Create a document template
-
Start a New Jasper Report:
- Click on the New Jasper Report icon.
- Select a template. It is recommended to choose a blank template.
- Enter a name for your report file.
-
Define the Data Source:
-
Right-click on the name of your report.
-
Select Dataset and Query.
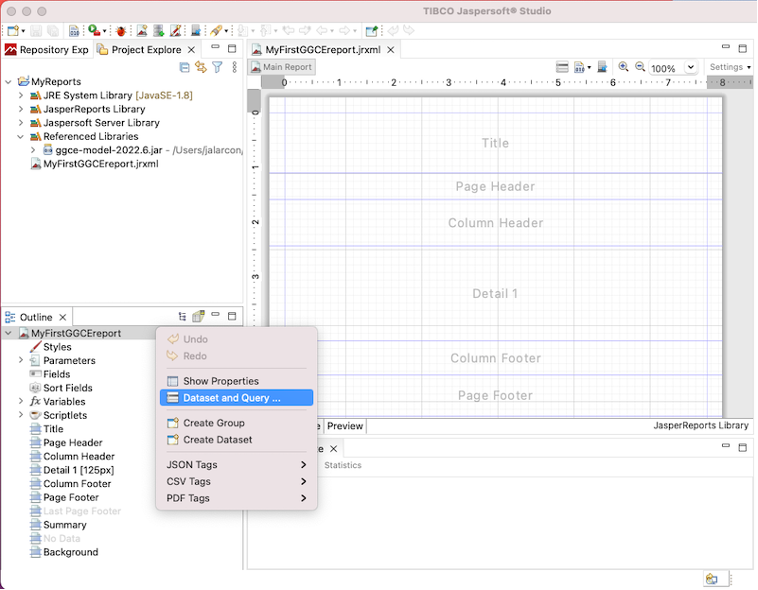
-
Click on the Java Bean tab and look for the Accession class by clicking the dots (...) and enter
accessionin the search field: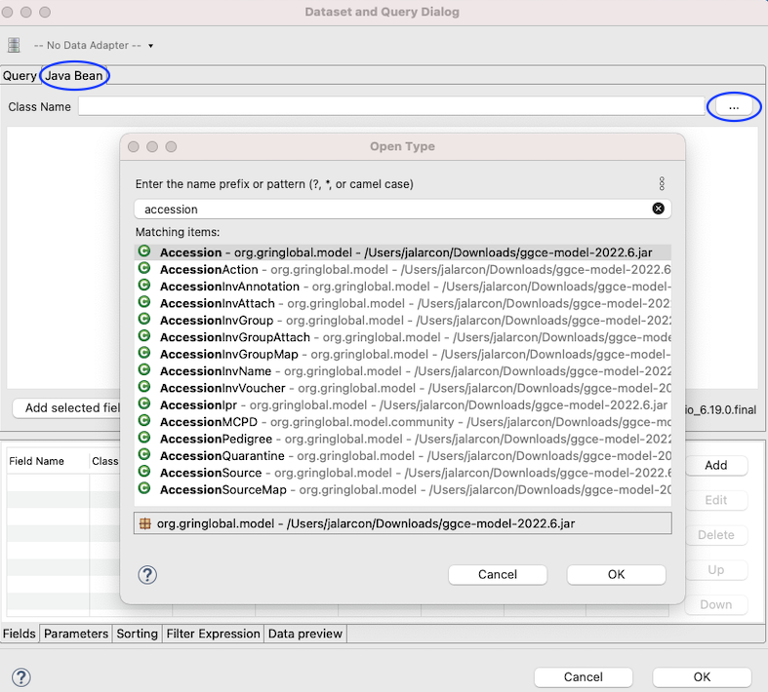
-
Select the fields to add to the report and click on the Add selected field(s) button.
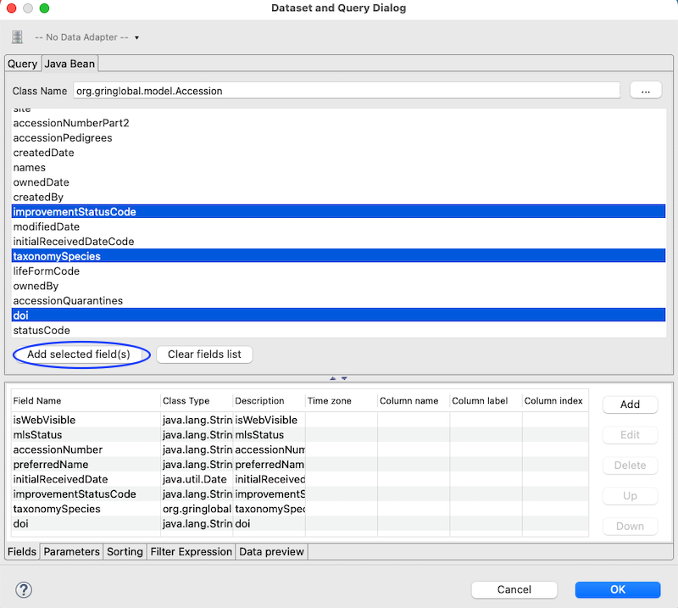
-
Click OK to close the dialog.
-
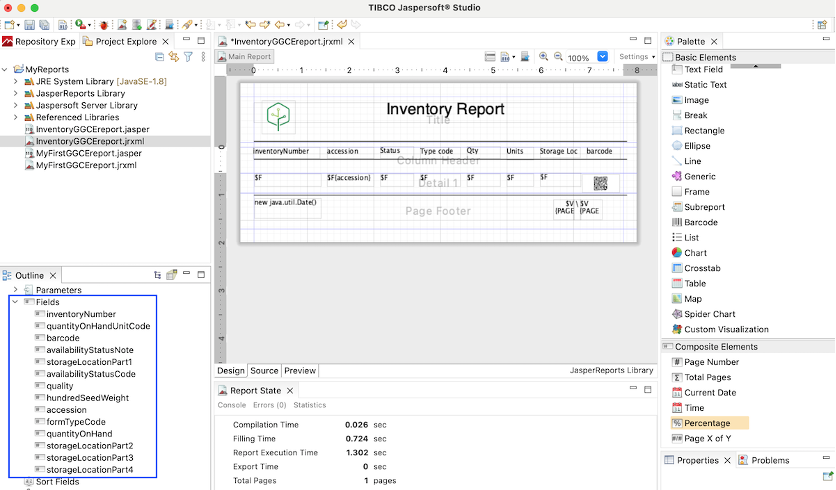
The selected fields are listed in the Fields group. You can drag and drop these fields into the report.
Upload the template to GGCE
The template file(s) created with Jasper Studio have to be uploaded to the GGCE's File Repository.
-
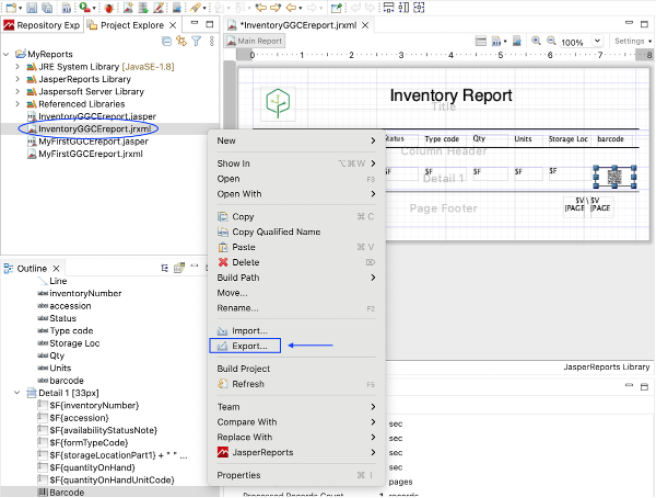
To export your report template, right click the report and select Export.
-
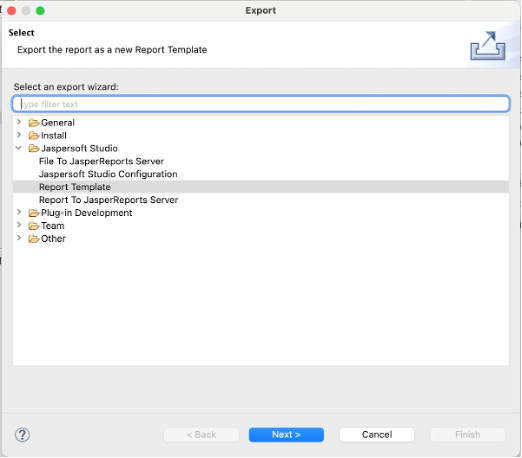
Select Report Template and click Next.
-
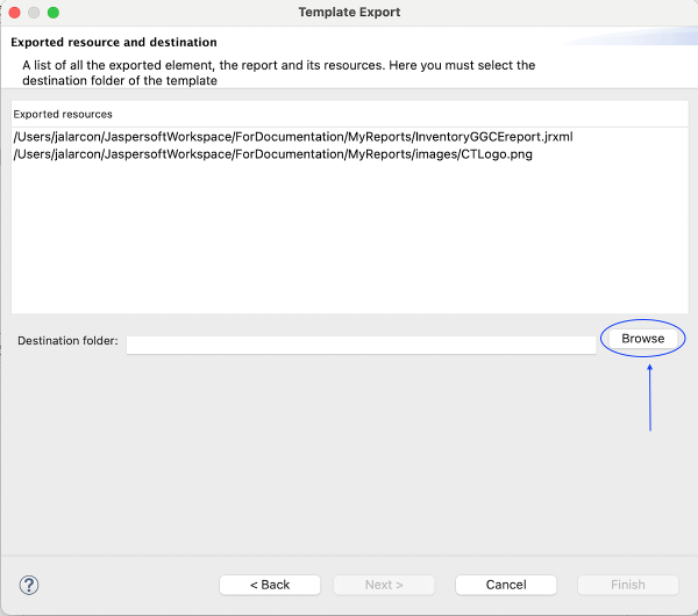
Browse for a destination folder.
-
Add the categories of the report.
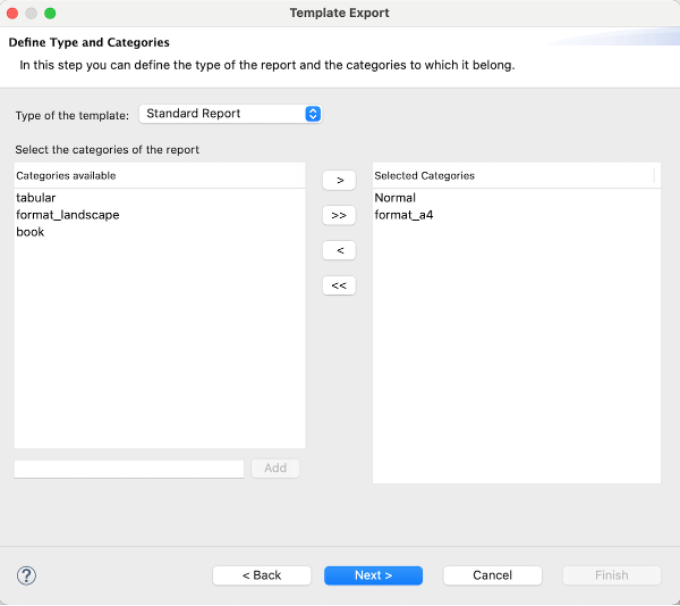
-
And Finish the export.
Jasper Reports Studio validates all areas where you must put a text, header, etc., and you may see an error message, but this is only for validation and doesn’t affect the report.
If your report has more than one file (for example images, which are kept in separate files), you can compress the files and upload them as a ZIP archive to GGCE.
-
To upload the file to GGCE, go to Admin-tools on the main page of GGCE.
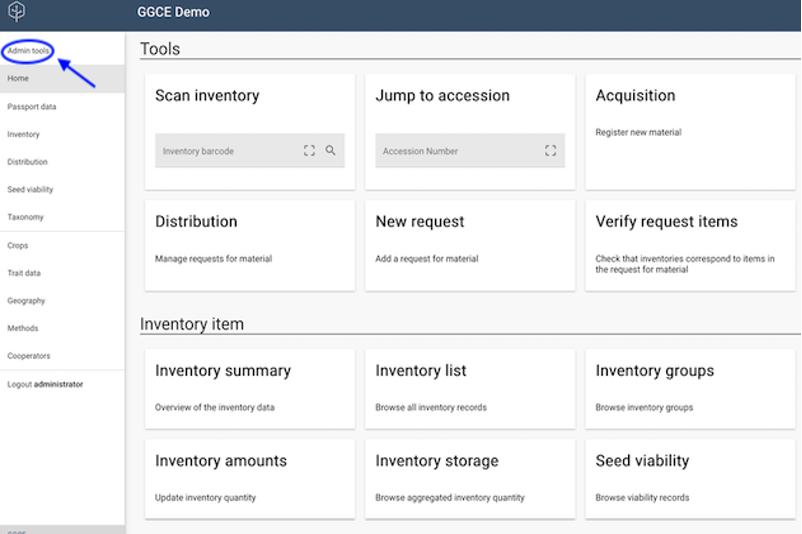
-
Select File repository and then reports.
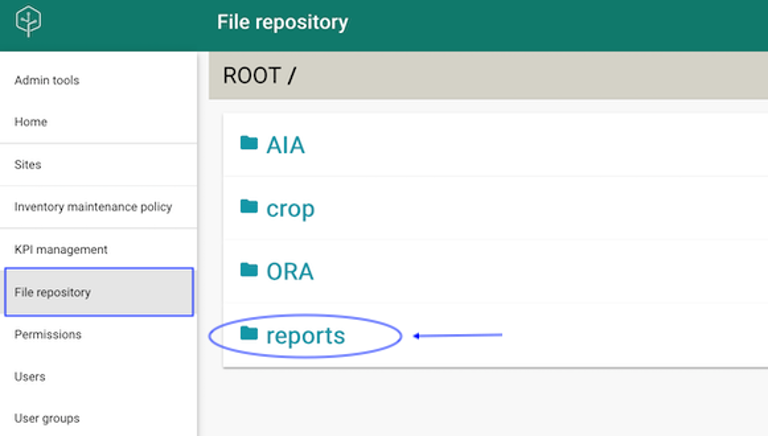
-
Create a subfolder with the name of the GGCE model where the report will be used. This folder’s name must start with an uppercase letter. Examples are:
Accession,OrderRequest,Inventory.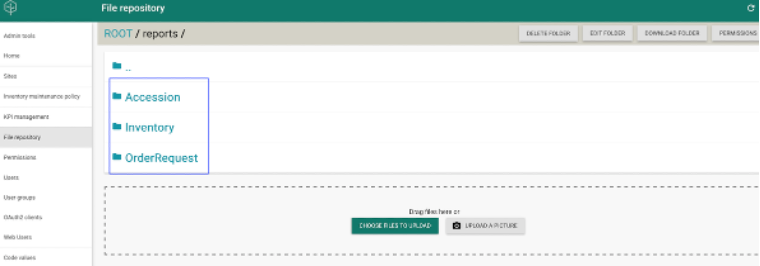
-
Select Choose files to upload and open your file.
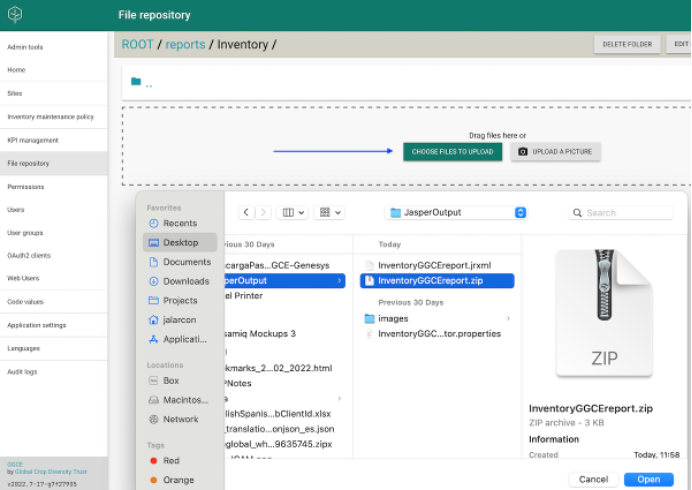
-
Unzip the uploaded file, if necessary.
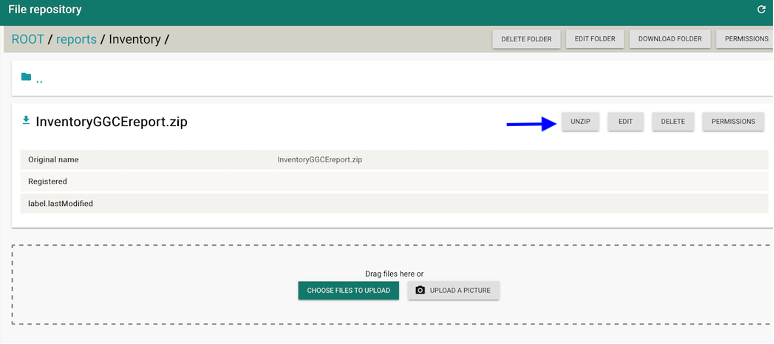
The Unzip action will create the images folder and extract the JasperReport file (for example, InventoryGGCEreport.jrxml).
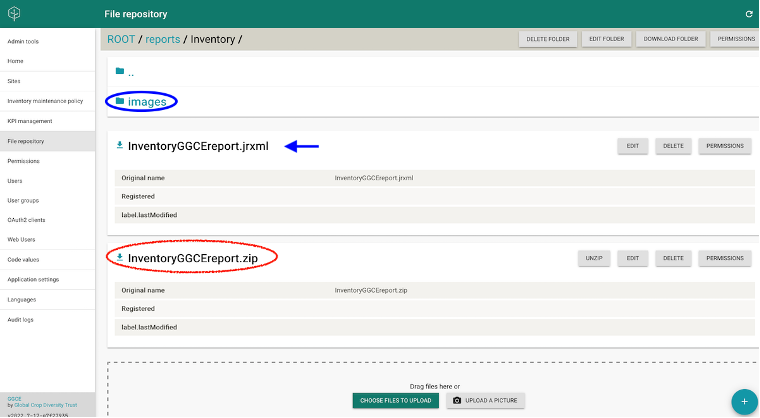
You can now delete the ZIP file from the server.
-
If using localization files, verify that the resources folder has also been created.
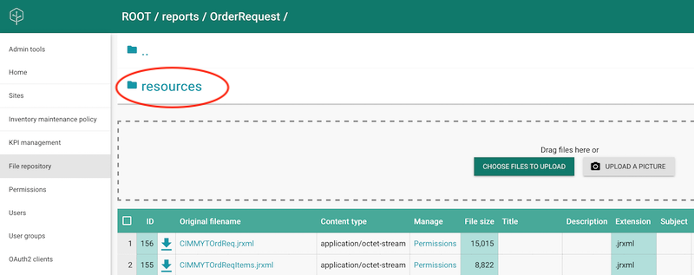
Custom template title
-
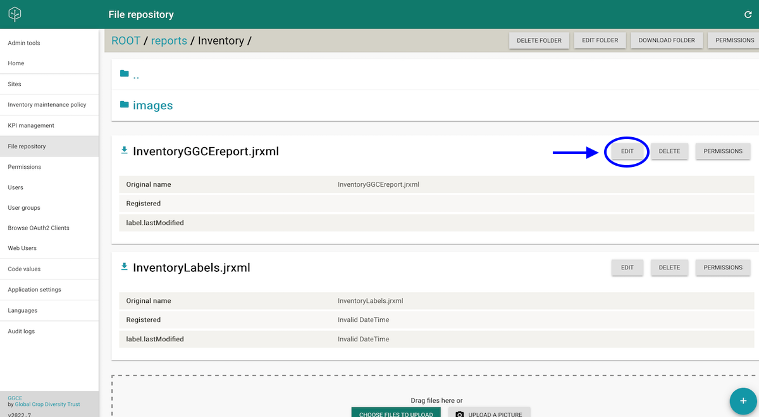
To add a title or description to the report, go to the report template and click on the Edit button.
-
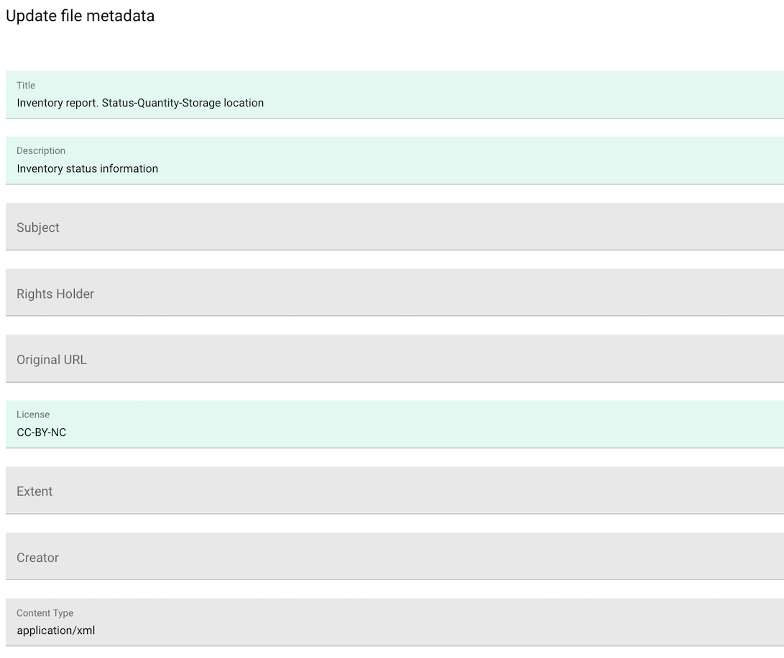
Fill out the information here.
-
GGCE will use the custom title and description in addition to the file name when presenting the template options to the user.

Generating a document
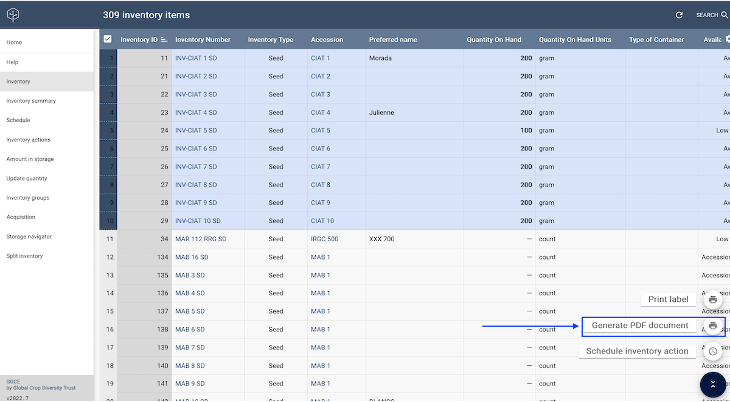
With the template now uploaded to GGCE, you can generate PDF documents with the Generate PDF document action.
-
Select the report template you wish to use.

-
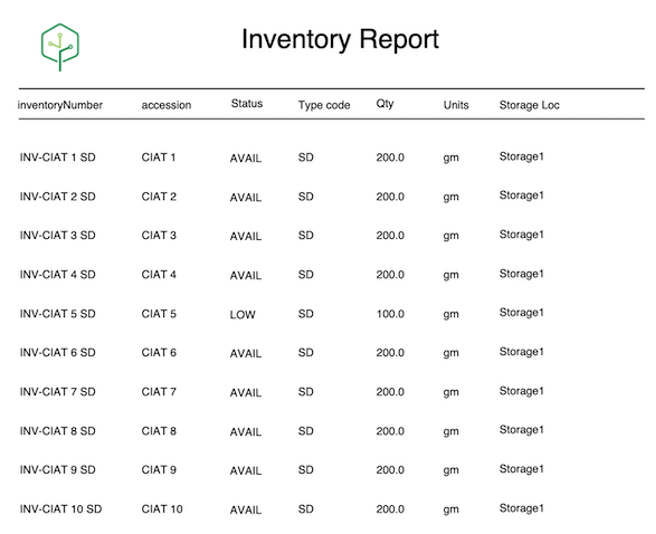
Click Generate PDF document to download the file:
Advanced topics
Accessing translated code values
In reports you will often need to display CodeValue titles, but these are no longer accessible in Jasper.
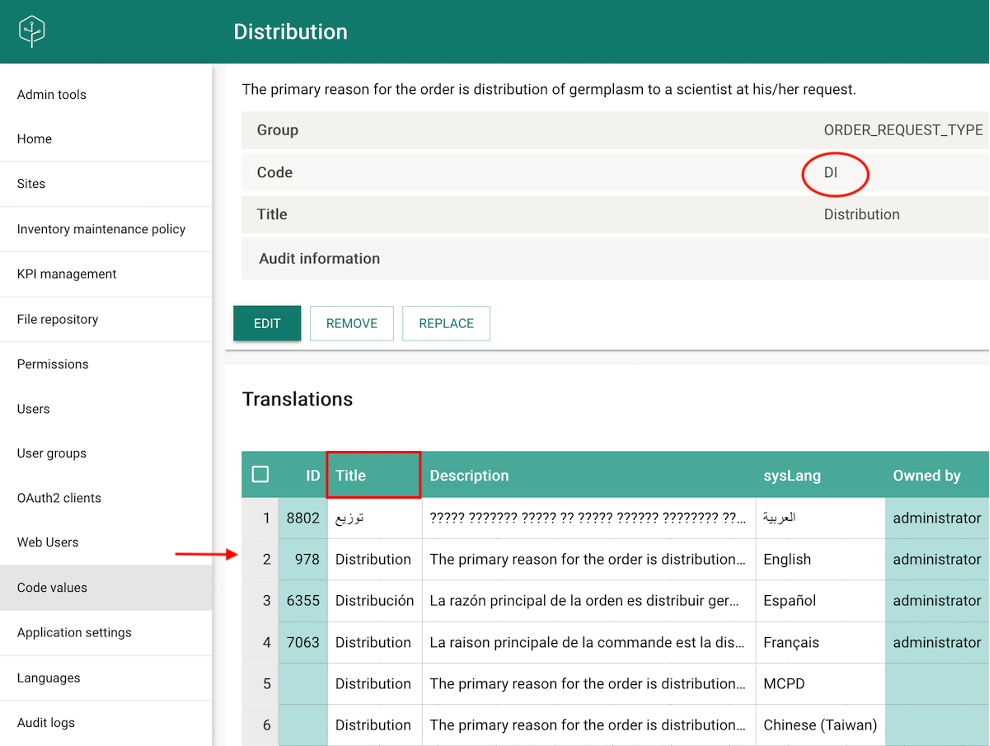
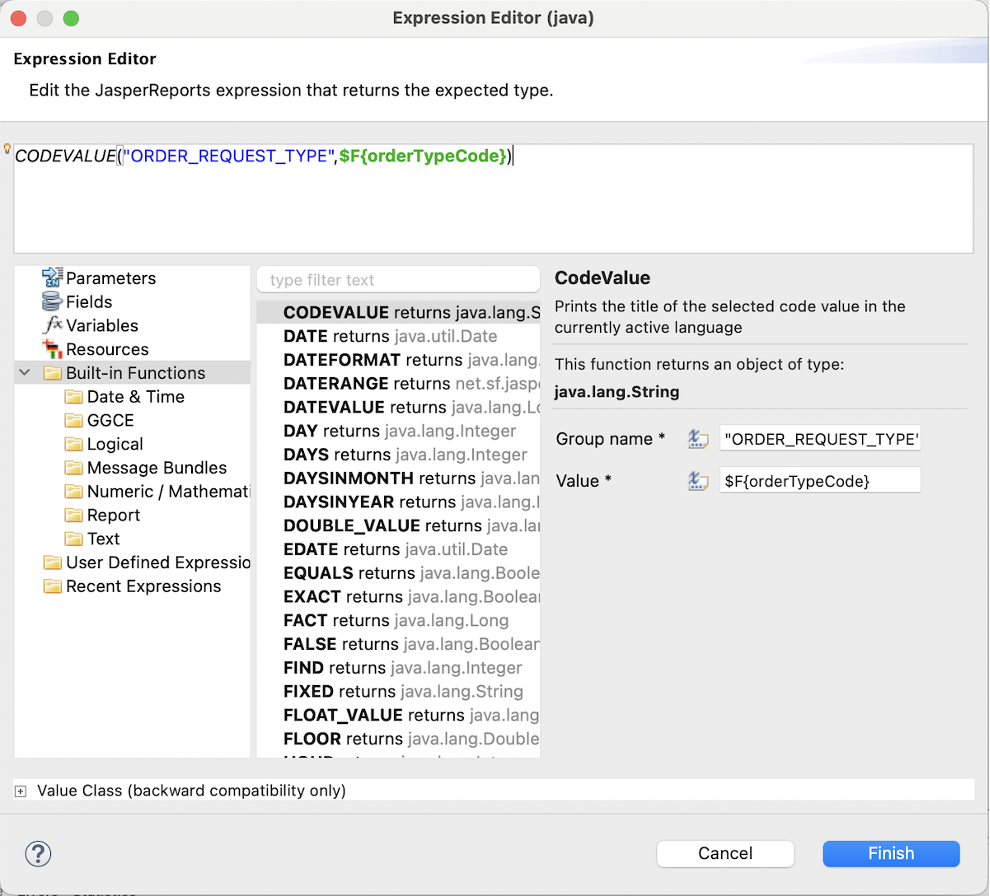
The CODEVALUE("CODE_GROUP", field.getSomeCode()) function will fetch the TranslatedCodeValue and return its title. The language will be the same as the template, and it must be defined in the languages of the code value, for example: For order_type = "DI".
To use the CODEVALUE function in the template, place a text element from the palette and get the function from Built-in Functions element.
Helper methods
Since Jasper Report Studio is not very helpful in navigating the object model, helpers provide shortcuts to commonly used data.
OrderRequest helpers
| Helper | Equivalent to |
|---|---|
reportFinalRecipientCountryCode() | getFinalRecipientCooperator().getCountryCode() |
reportShipToCountryCode() | getShipToCooperator().getCountryCode() |
reportRequestorCountryCode() | getRequestorCooperator().getCountryCode() |
OrderRequestItem helpers
| Helper | Equivalent to |
|---|---|
reportAccessionNumber() | getInventory().getAccession().getAccessionNumber() |
reportAccessionName() | getInventory().getAccession().getPreferredName() |
reportAccessionCollectCountryCode() | getInventory().getAccession().getCollectingSource().getCountryCode() |
reportSourceInventoryNumber() | getInventory().getInventoryNumber() |
reportWithdrawnInventoryNumber() | getWithdrawnInventory().getInventoryNumber() |
Subreports in Jasper Reports
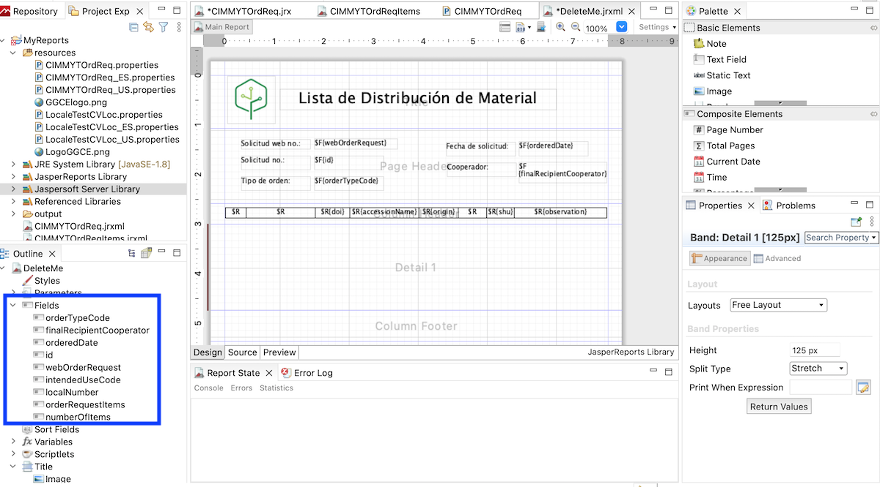
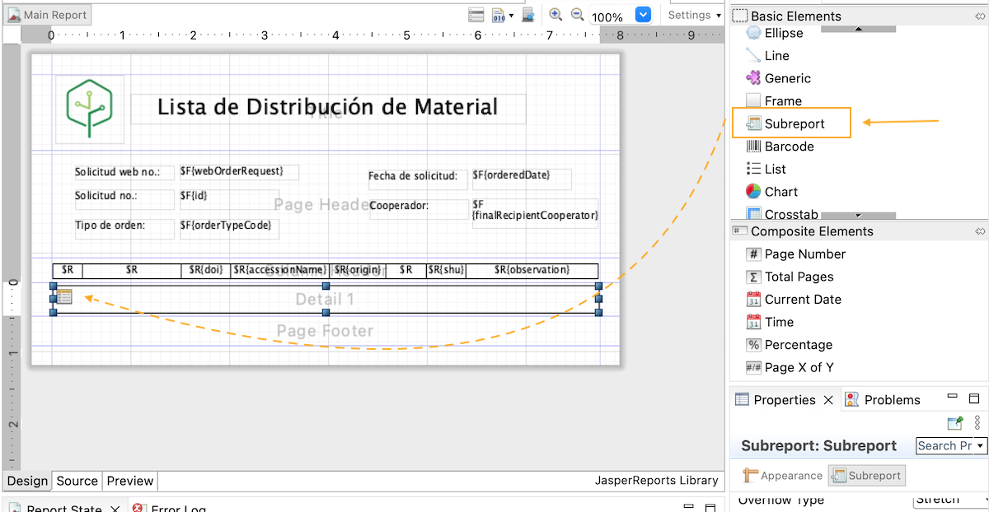
Jasper Reports includes a feature that allows you to embed subreports within a main report. For example, you can create a report detailing a material request that includes the requester’s name, request type, intended use of the material, and a list of items in the request, as illustrated below.
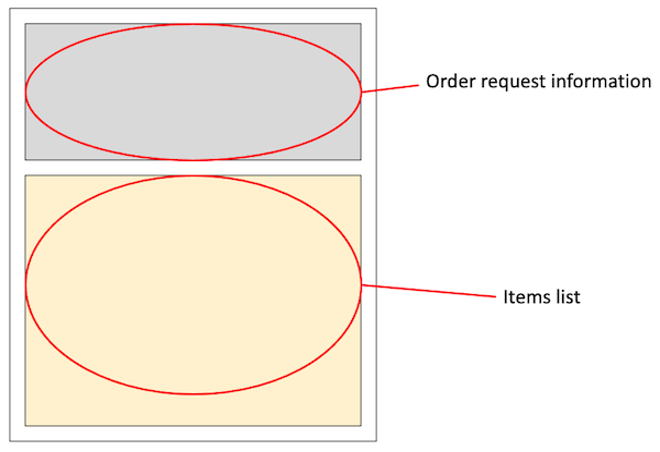
In order to achieve this, you will need a main report and a subreport.
Main report
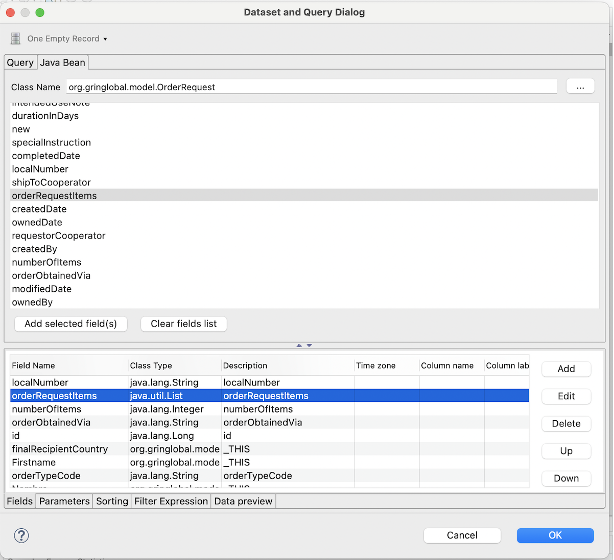
Here you can follow the instructions in “Creating a report template for GGCE” above. However, for this particular report, select the OrderRequest class in the Java Bean tab, as the main report will present the request information.
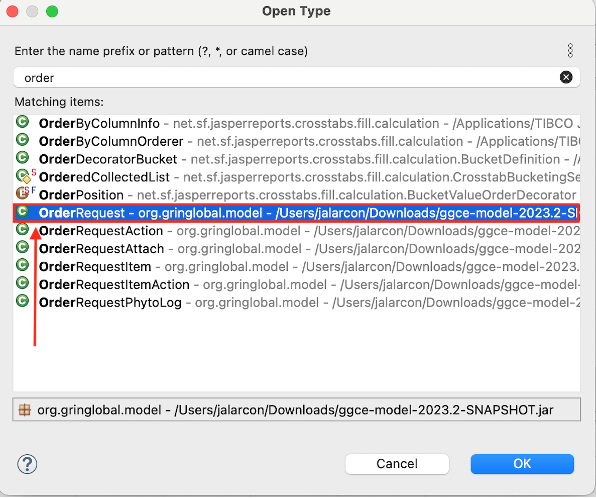
You can choose the relevant fields and design the main report accordingly – but for this case, also select the orderRequestItems list, because this object will be the Datasource for the subreport.
Subreport
Next, proceed to create the subreport responsible for displaying the requested items. To do this, start a new report, again following the instructions in “Creating a report template for GGCE” above. For this example select the OrderRequestItem class in the Java Bean tab, as the subreport will showcase the request items.
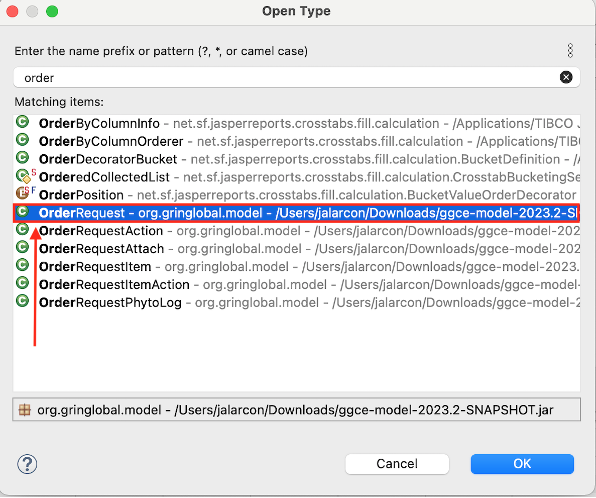
Select the necessary fields and design the subreport accordingly.
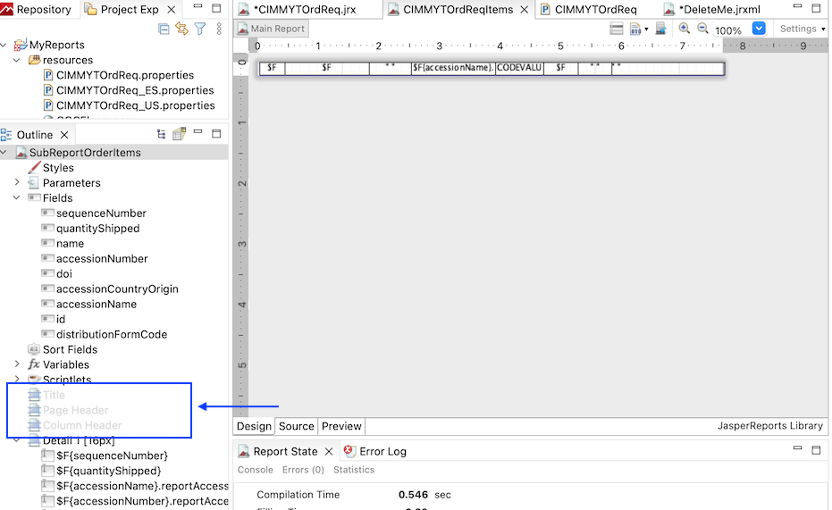
Since the subreport only displays the request items, you can delete the Title, Page Header, and Column Header sections from the subreport.
Completing the main report
Open your main report and place a Subreport element from the Basic Elements palette into the detail band to launch the wizard.
Choose Select an existing report (selected by default), click the Select a report file button, select Workspace resource, and Browse by the report. A window listing all created reports appears. Select OrderRequestItems.jrxml, click Ok, then click Next.
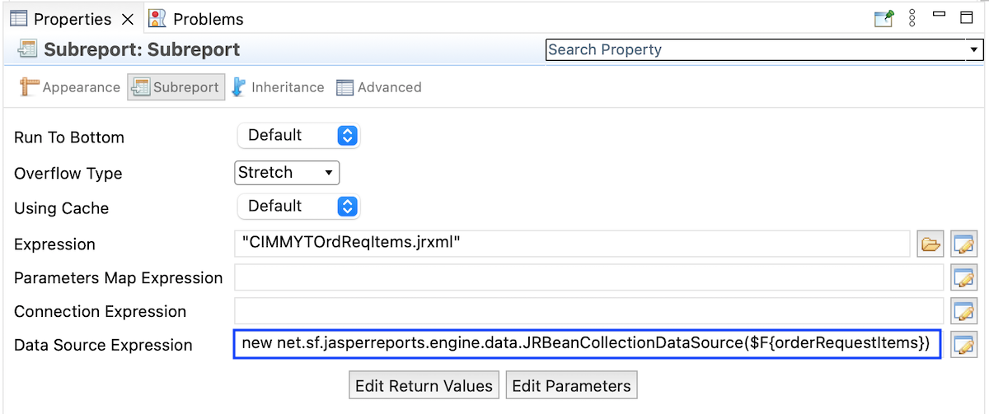
The data source of the subreport will be the orderRequetsItems object from the main report.
Localization
Jasper Reports allows for the internationalization of reports through the use of localization files. To do so, you first add a locale properties file to your project, and then specify the paths to the locale properties file(s) in your report.
Adding locale properties files to a project
First, add a new folder to your project by right clicking on MyReports and selecting New and Folder. Give the folder the name resources.
Right click on the new folder and select Build Path and Use as Source Folder.
Make sure to move all the localization .properties files to this folder. Following the naming convention, the localization files should start with the name of the report followed by _XX.properties, where XX is a 2-character language code, for example: OrdReq_ES.properties where ES is for Spanish.
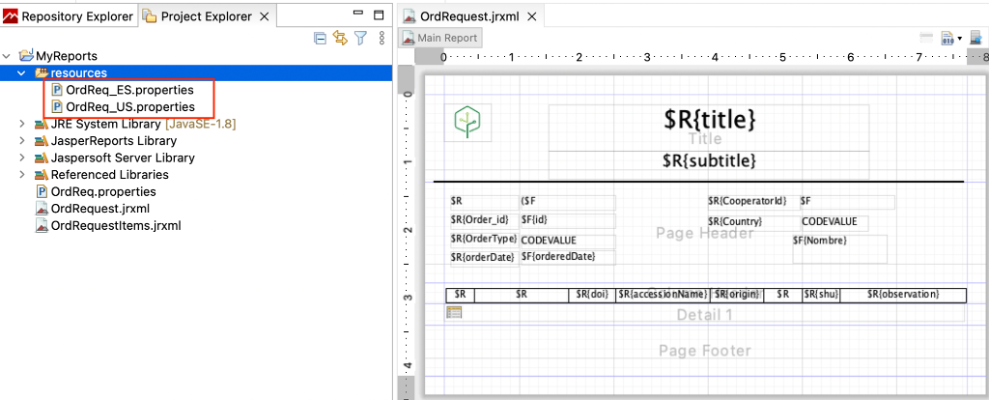
An example locale properties file looks like this:
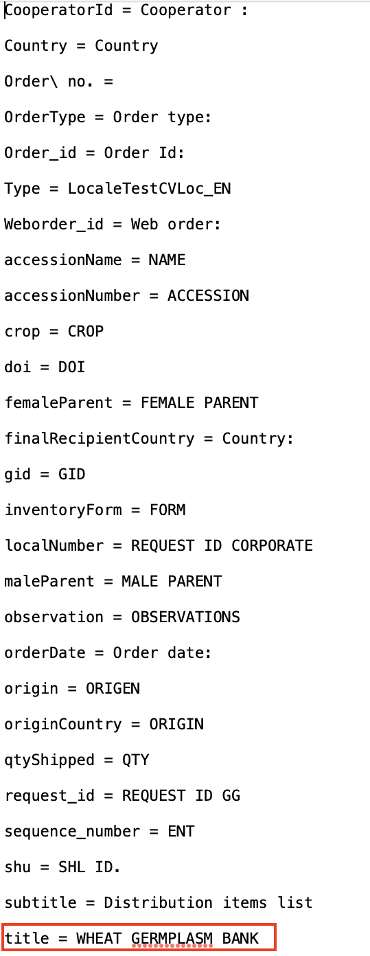
As you can see, some text elements can be added to reports, and each element points to a corresponding element from the locale properties files.
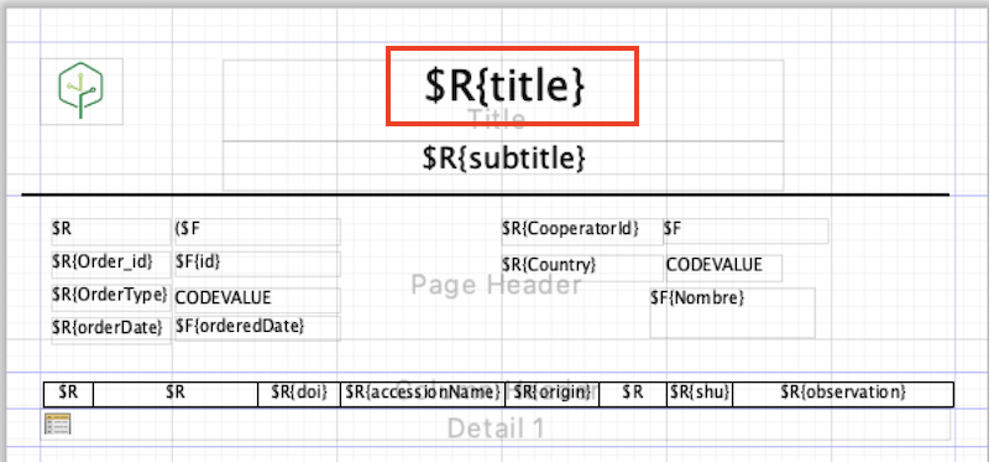
To add text elements from the localization files, you must select them from the Resources element list.
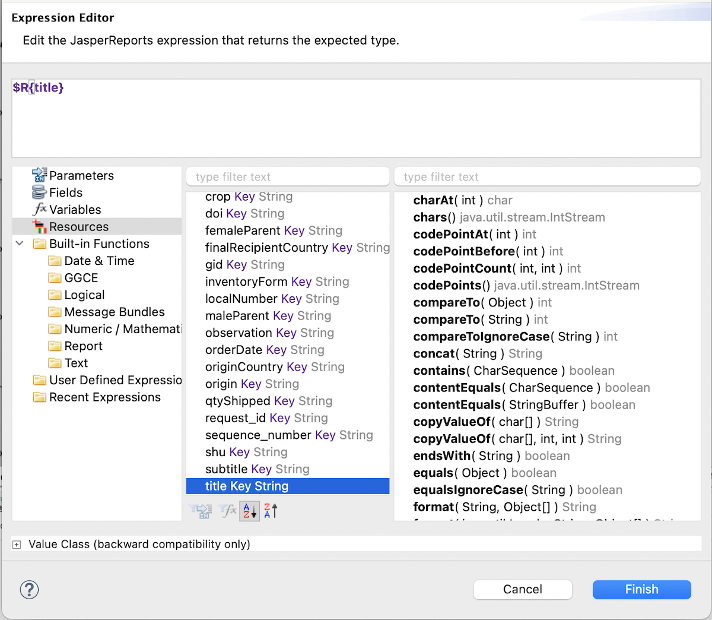
Specifying paths to locale properties files
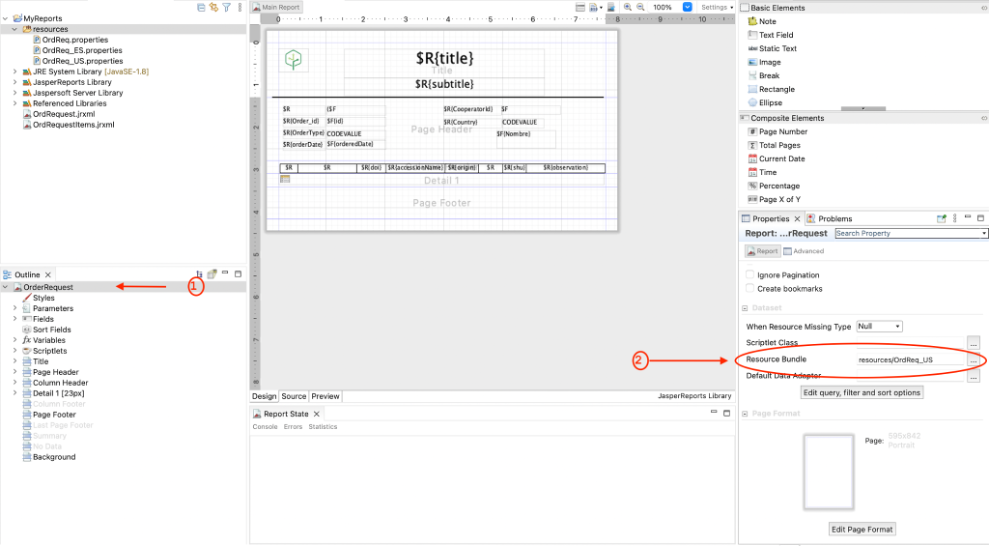
You can now reference the locale files in a report with just one step. In the Outline window, click on the report name. Under Resource Bundle, specify the file, e.g. resources/OrdReq_US, and save the report.
