Distributing germplasm
Germplasm samples are requested from a genebank’s stock for many different reasons: fulfilling requests for germplasm from external users, germination (viability) testing, tetrazolium (TZ) testing, experiments, regeneration, etc. In all cases, since the germplasm must be accounted for, the original inventory quantities must be reduced by the quantity of germplasm being used for the purpose. Using GGCE’s Distribution features, your genebank can do this effectively, ensuring the quantities are correctly recorded in real time and the processes for doing so can be planned.
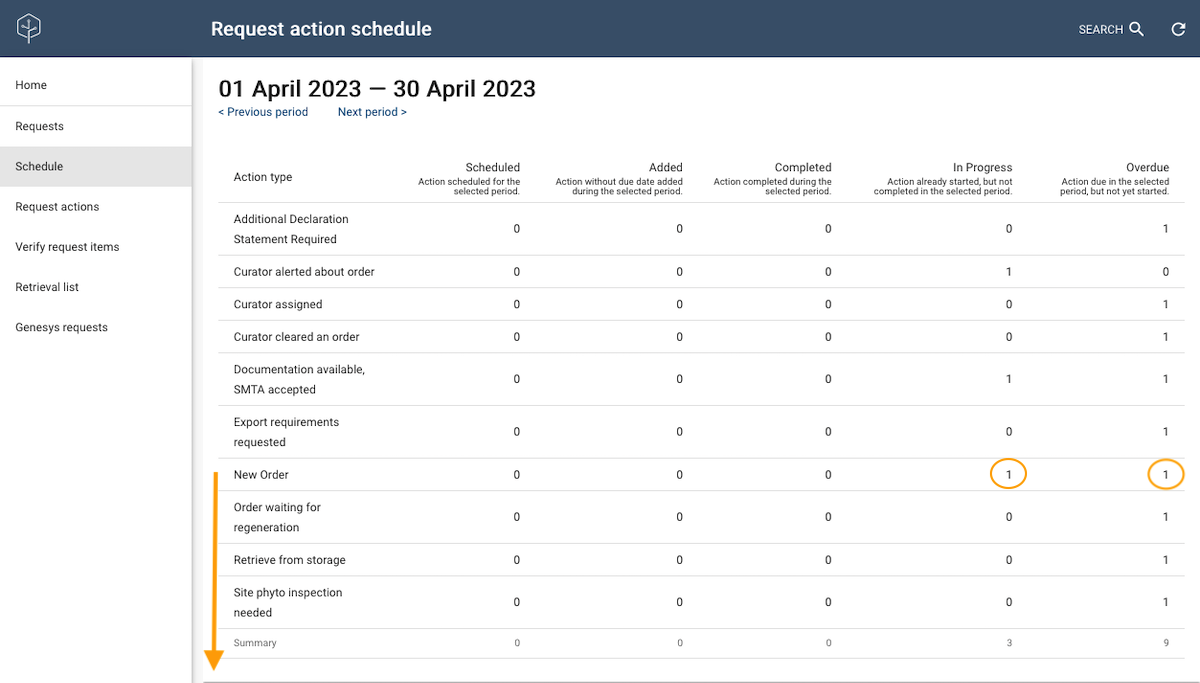
You can manage the processing of distribution requests by associating actions with each distribution. For example, when your genebank receives an incoming germplasm request, this new request should be immediately entered into GGCE and a New order action for the request should also be recorded. Now the request’s action will be visible to GGCE’s Schedule feature, and your genebank can plan for the distribution requests that need to be processed.
Germplasm material (usually seeds) distributed for regeneration ultimately returns to the genebank and is stored as a new, separate inventory lot – a new generation – for future purposes. Your database should be ready to receive the fresh material’s data (quantity on hand and other details) when it arrives. GGCE can automatically generate new inventory records with the Create withdrawn inventories functionality. GGCE also automatically links each new inventory record with its source (parent) inventory and populates the relevant fields.
The Distribution area of GGCE allows the access and management of requests through the following sections.
Requests
This section displays the list of requests with their primary data. You can see the details of a request using the links in the ID or Final Recipient columns.
If you want to see only a specific set of requests, the filtering (Search) option allows you to find the desired requests through different constraints.

Creating a new request
New requests should be recorded as soon as they are received. The general flow for creating a new distribution request is:
- Complete the Request form for the new request.
- The recipient of the requested material must be indicated; if the requestor is new, their cooperator (contact) data must be entered (and in some cases, for existing cooperators in the GGCE database, the data may need to be updated).
- Indicate the accession or inventory items that were requested.
- Add an action item for the request so that GGCE’s Distribution Schedule feature can be used to manage the processing of the request.
- Add any attachments (files) that will be associated with the request.
Adding a new distribution request
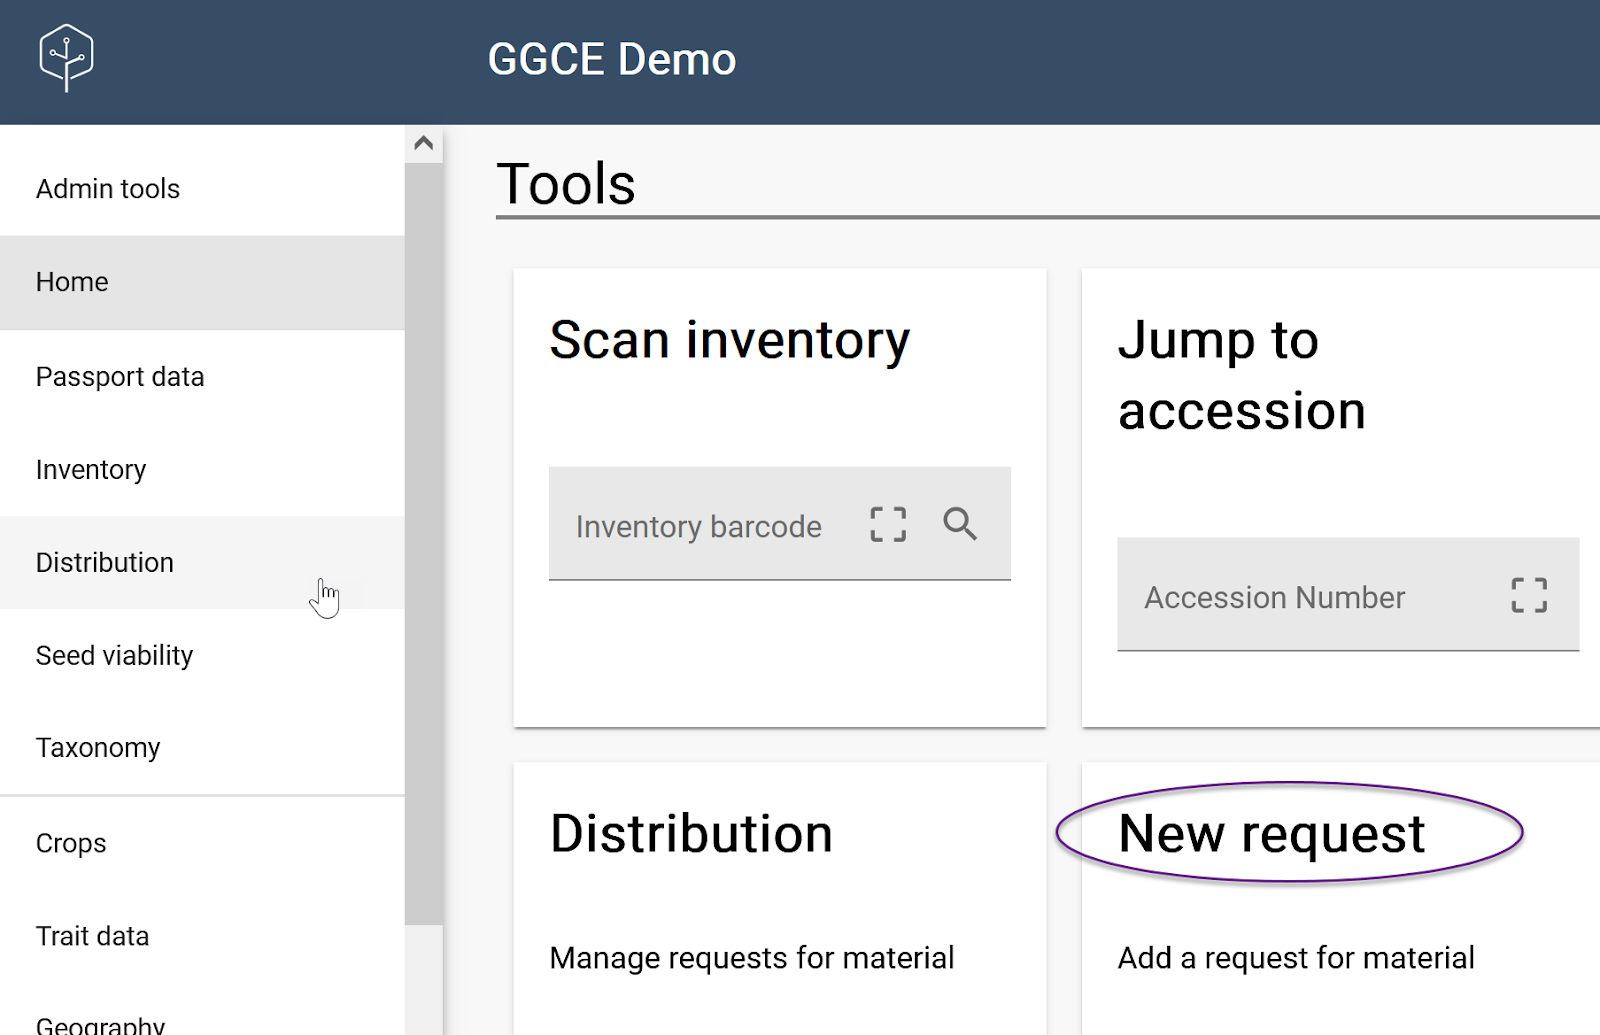
There are several ways to initiate a new request in GGCE, but the simplest is to use the New request link on the home screen.
Alternatively, you can select the Distribution option on the left menu. In the Requests screen, where requests are listed in the grid, use the plus (+) button to display a New Request form.

New Request form
In the GGCE database you will be able to find requests by various fields. A few fields in the request form are mandatory, such as the three requestor fields and the Order Type. Other fields are optional, such as Local Number. Some genebanks keep track of their requests by various means other than GGCE, and they may maintain a list of numbers to identify their requests. In this situation you can use the Local Number field to store those numbers in GGCE, but this is definitely an optional field. As a general principle, the more data is filled in on the request form, the easier it will be to search for specific request items later.
For the Order Type field, you must select from the list of distribution types. The form also has three fields (Final Recipient, Ship To, and Requestor) that require a cooperator to be selected.
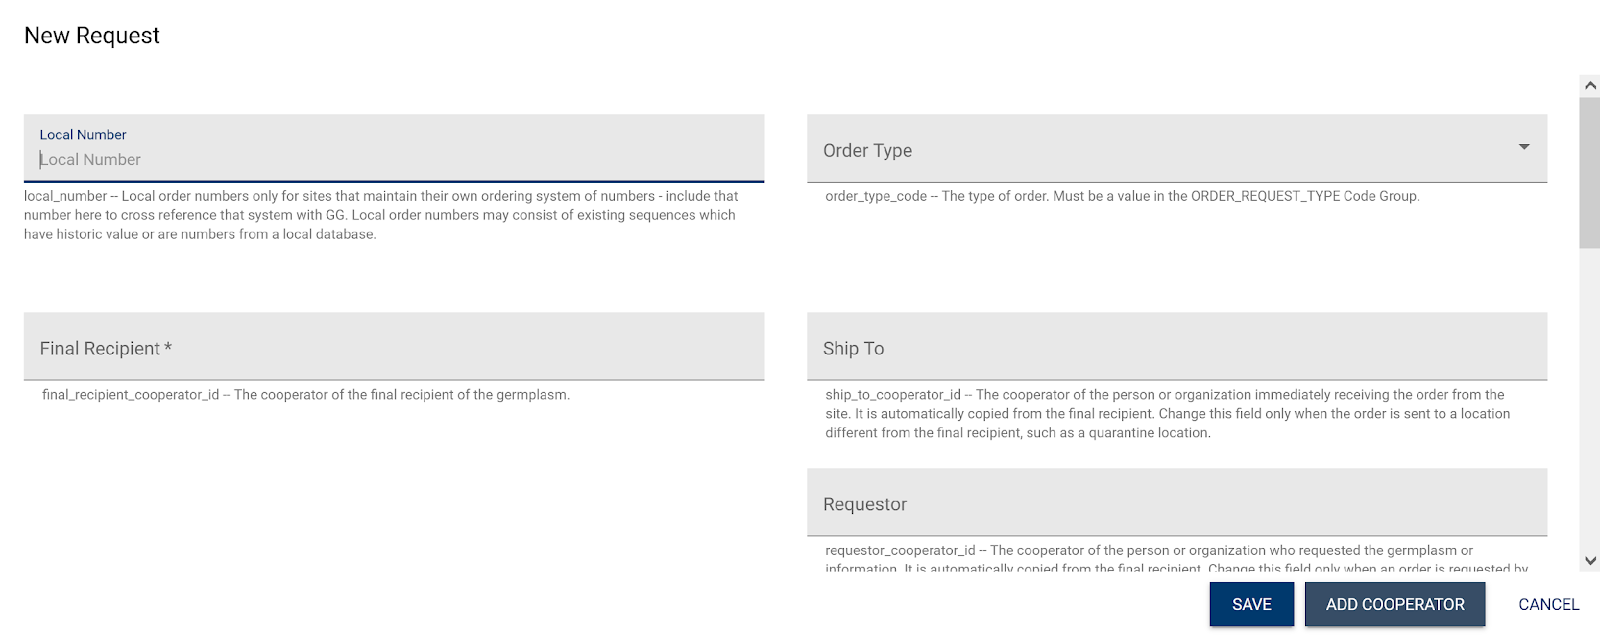
A cooperator is a person or an organization that has any association with your genebank – in this case, a requestor. When a request comes from someone not already in the cooperators, you will need to register their contact information before registering the request. If the cooperator’s name is not in the database, use the Add cooperator button. For details on adding cooperators, see Cooperators.
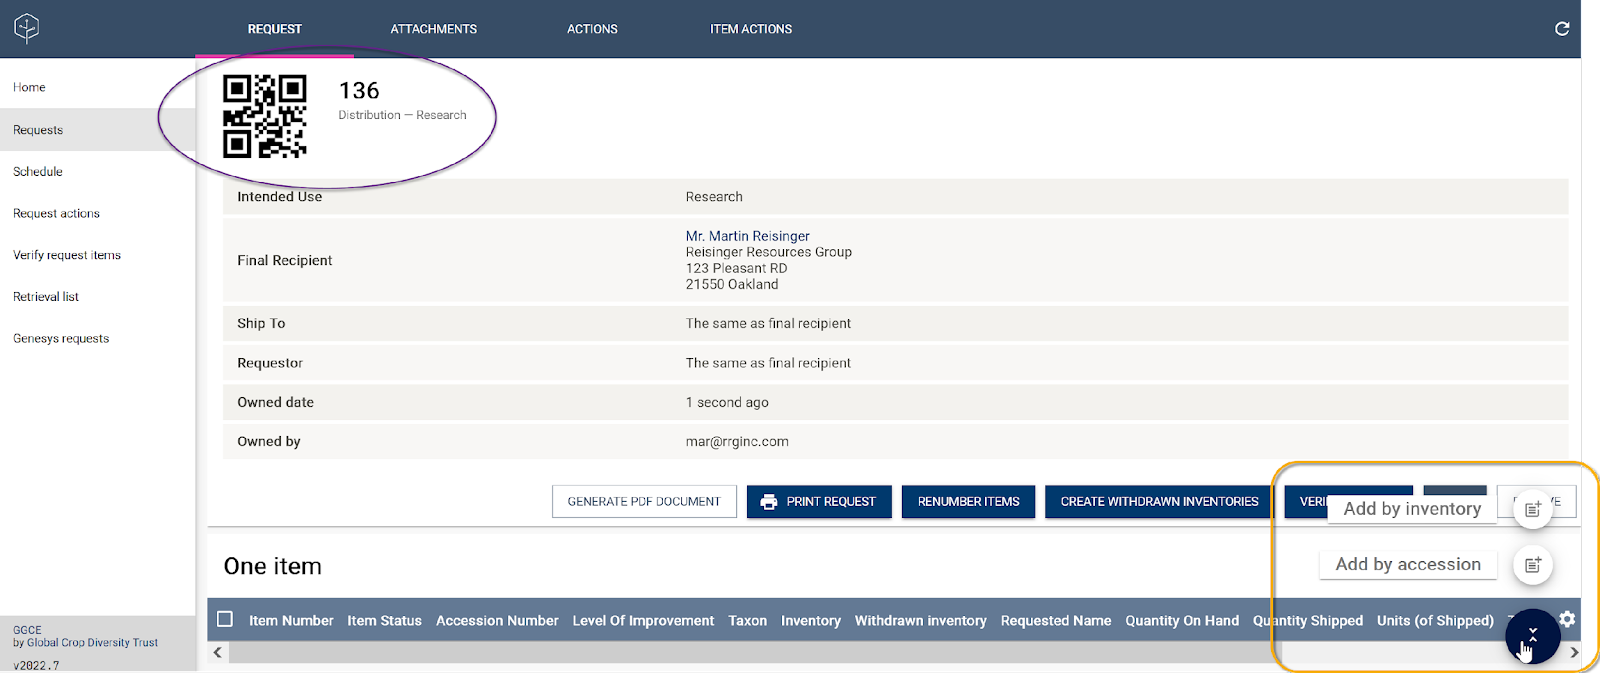
After a valid cooperator is either selected or created, the request will generate a request number (sequentially assigned), a corresponding barcode, and a grid where either accession or inventory items can be added to the request.
Adding items to a request
Initially a new request has no items included. You can add items immediately after creating the request, or later. You add new items via the plus (+) button. Items to be added may be either accessions or inventory items, and both follow a similar process. In the following example inventory is used.

Adding by inventory
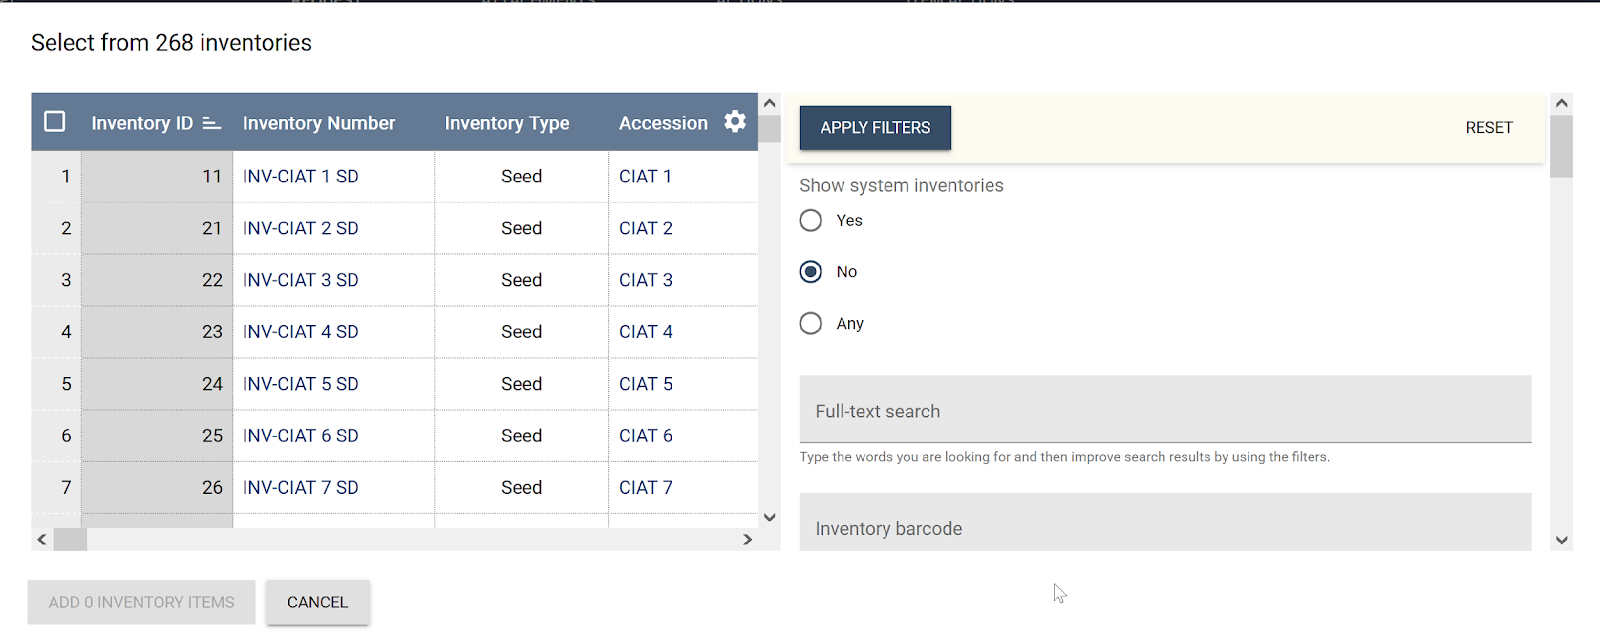
Initially, the screen lists all physical inventory items (the radio button is set to “No” for Show system inventories). The filtering tool can be used to change the radio button selection as well as select specific inventory using criteria. Select items from the grid by clicking or tapping on the left column.
In the example below, after applying a filter, the original list has been filtered to five inventory items – these five items were selected using the Select all checkbox in the top left corner.
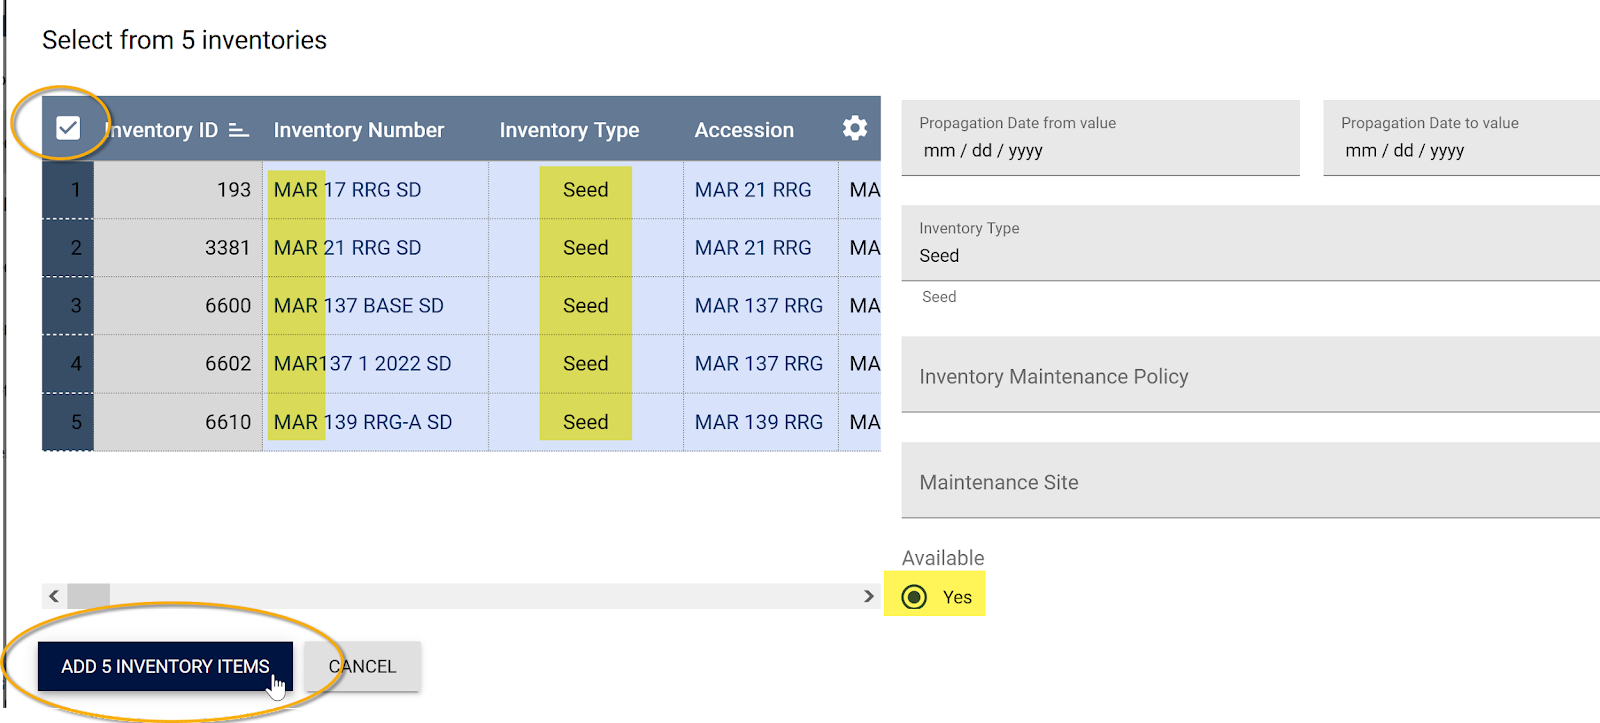
Click or tap the Add n inventory items button to add the items to the request. The items are listed in a grid below the request’s general information.
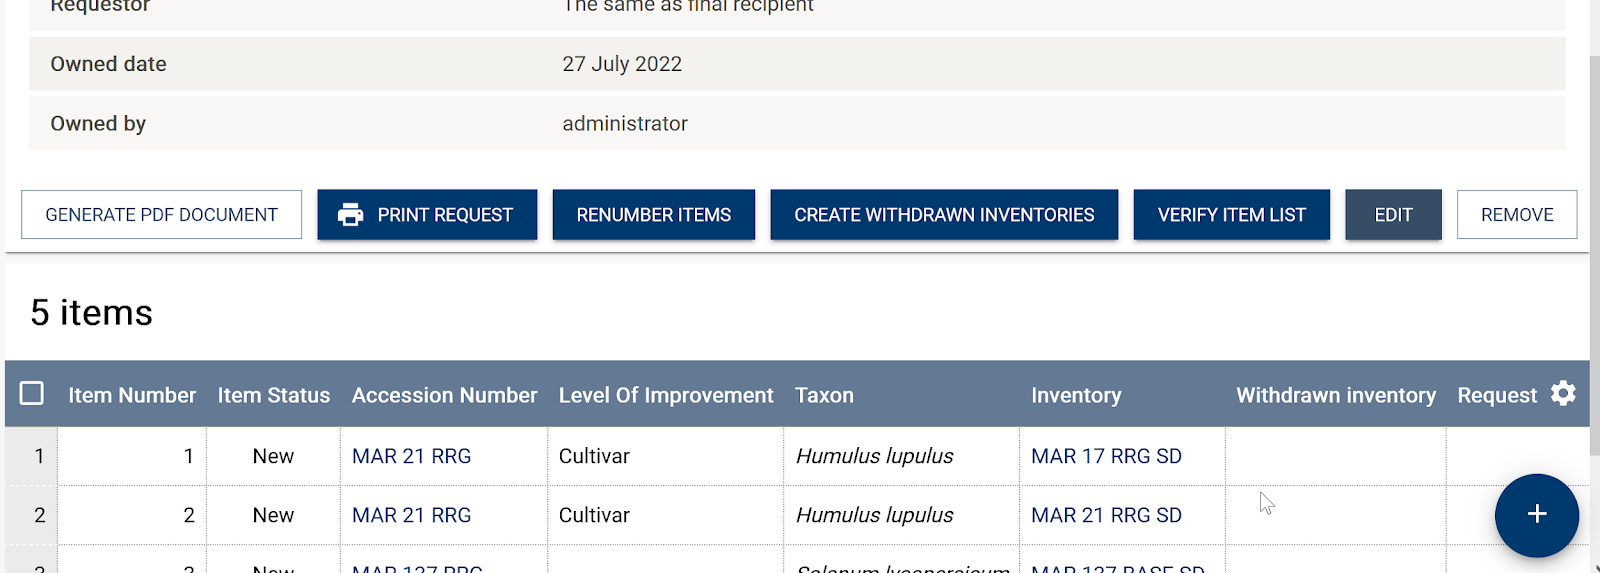
You can now add more items, leave the request as it is for future processing, or take other request actions.
Schedule
Existing requests are typically managed via GGCE’s Distribution Schedule function. The schedule summarizes by request Action type and indicates the number of actions that are scheduled, added, completed, in progress, and overdue for the time period indicated.
