First steps
This guide provides the best-practice first steps for GGCE administrators.
Administrator account
A fresh install of GGCE comes with one user account with permissions to navigate and manage the entire system: the administrator user. The default password for the administrator user is: administrator.
Changing the password of the administrator account is the first step after deploying GGCE.
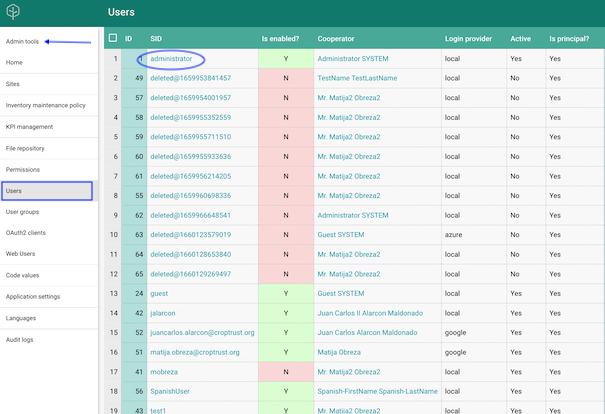
- Go to Admin tools.
- Select Users.
- Select the administrator user.
- Change the password.
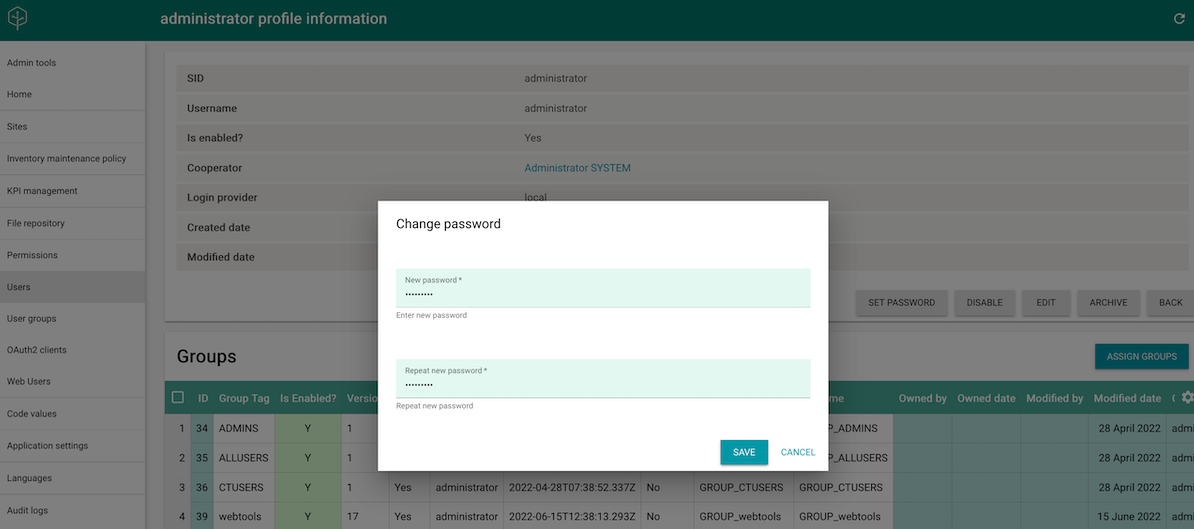
- Store the new password somewhere safe!
- Test the new password by opening GGCE in a new private tab in your browser.
This procedure does not apply when you migrate from GRIN-Global to GGCE. If you use your existing GRIN-Global database, then all user accounts and their passwords remain the same.
Creating users with administrative privileges
A good practice in data management is to log in as the administrator user as little as possible. Instead, our recommendation is to create a user with administrator rights, for example a user account for the data manager.
User accounts are linked with the Cooperators address book, where contact information (such as a full name and address) can be found.
Creating a user:
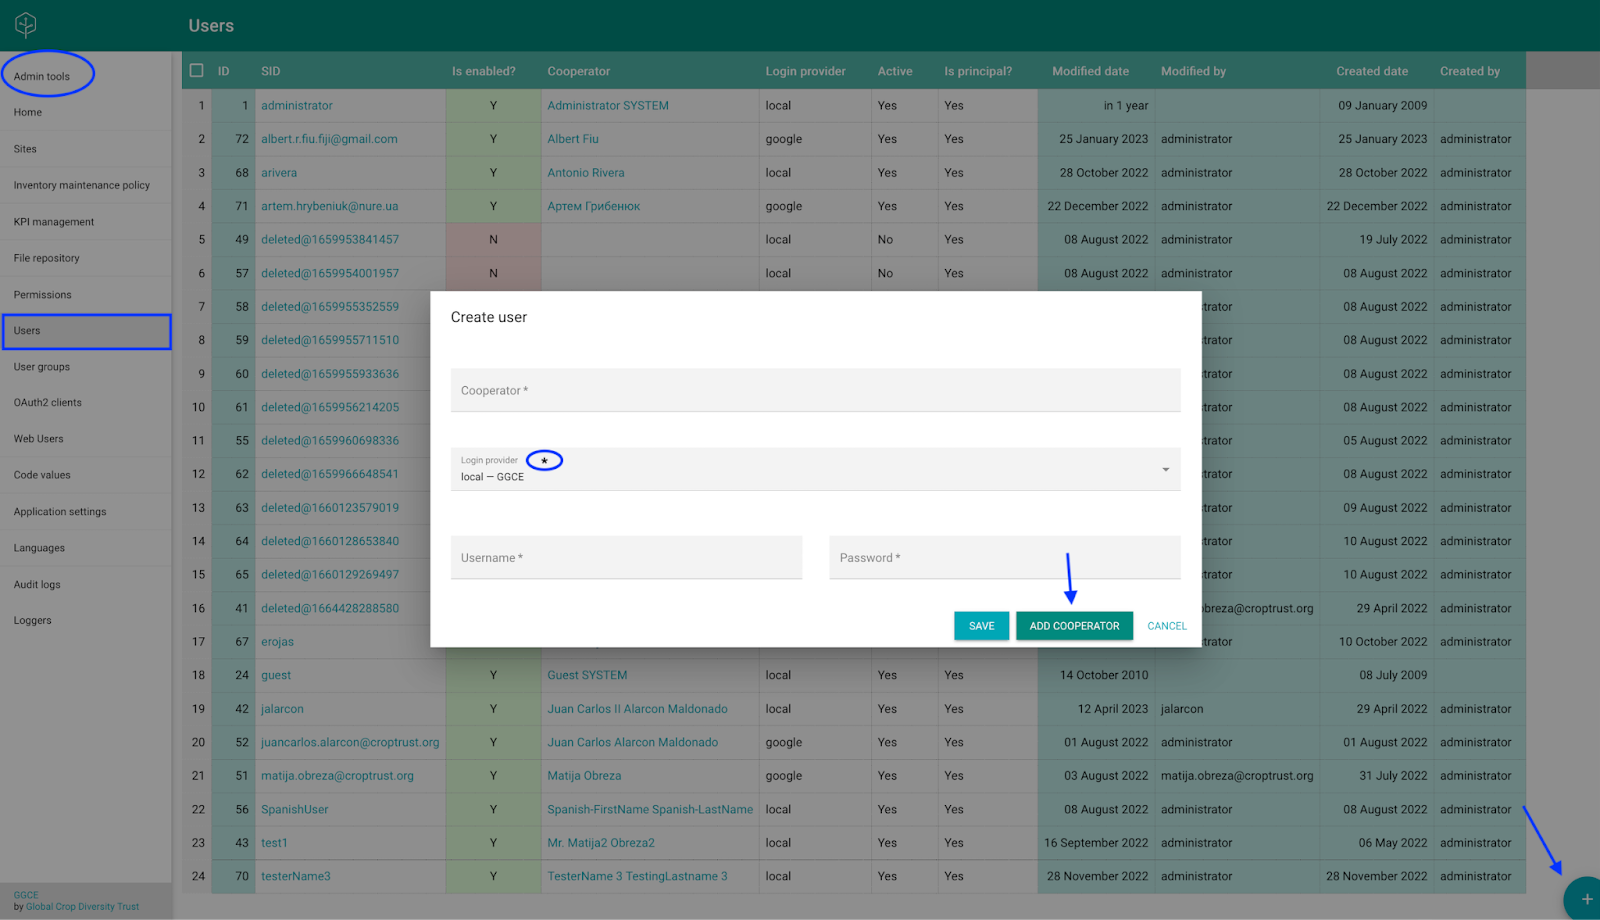
- Select Users.
- Click or tap the plus (+) button
- Fill out the form, hit Save.
To register the information of a cooperator that is not yet in the system, click or tap the Add cooperator to register a new record, then continue with the registration of a new user account:
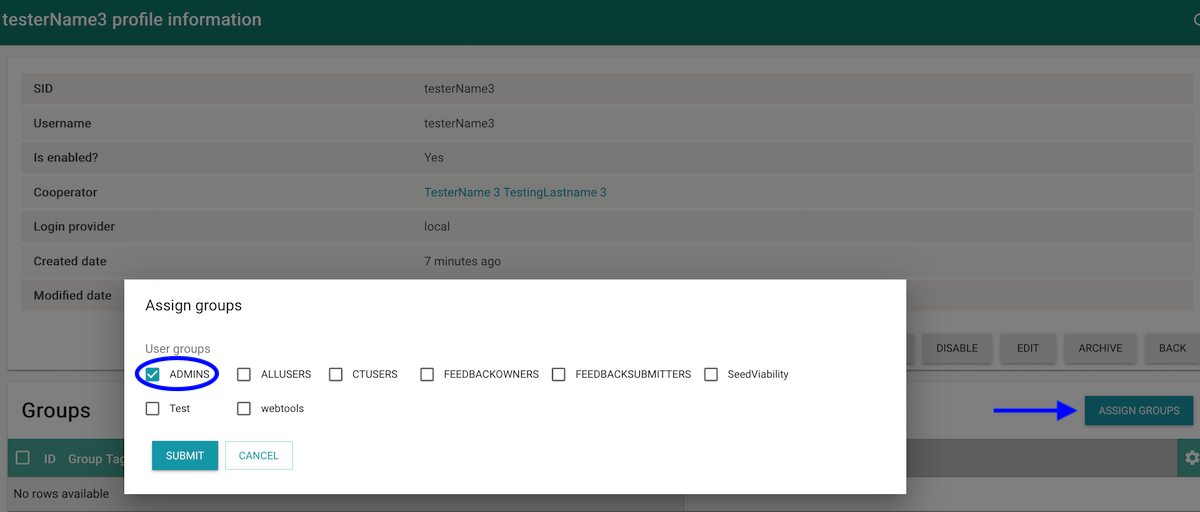
Once the user is created, the next step is to use the Assign groups button and add the user to the administrators group (ADMINS).
Sites
A site is a location or place where material is maintained or stored. An external duplicate backup of your material (e.g., the Svalbard Global Seed Vault) is also a site; so is an experimental station of your institution.
To set up a site:
- Go to Admin tools.
- Select Sites.
- Click or tap the plus (+) button to open the dialog to register a new site.
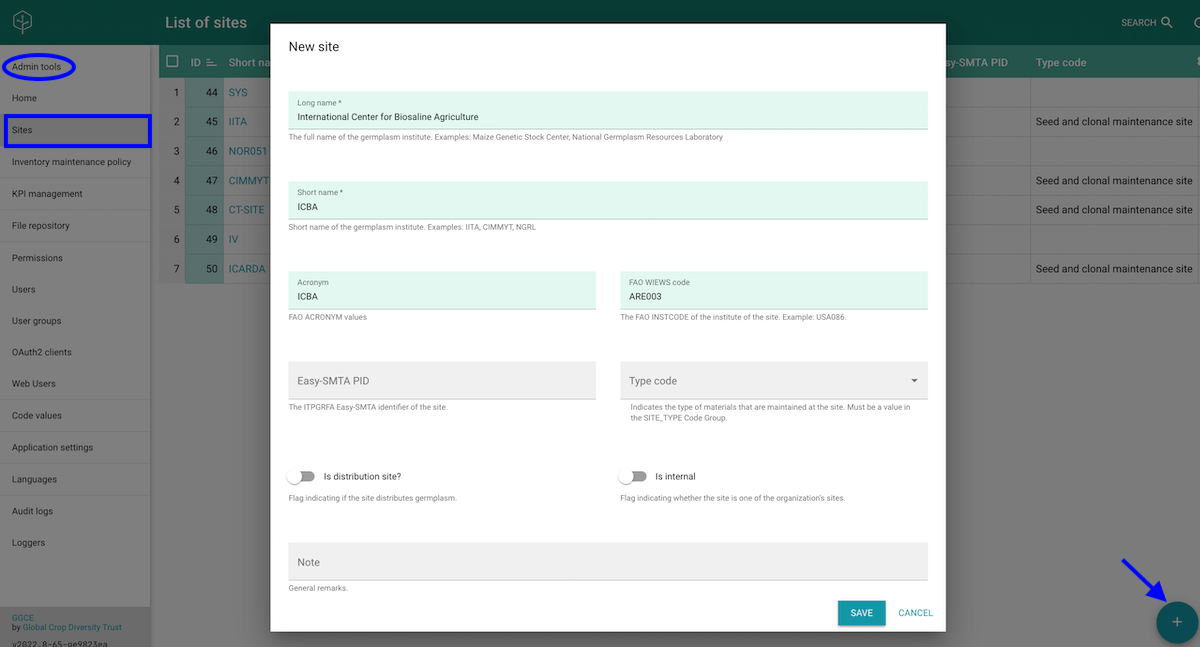
Fill out all required and relevant information for the site and select Save.
GGCE differentiates between external and internal sites. Internal sites are those that belong to your organization, and you can only assign germplasm inventories to internal sites. Make sure to enable the “Is internal” option when setting up an internal site! All other sites are external.
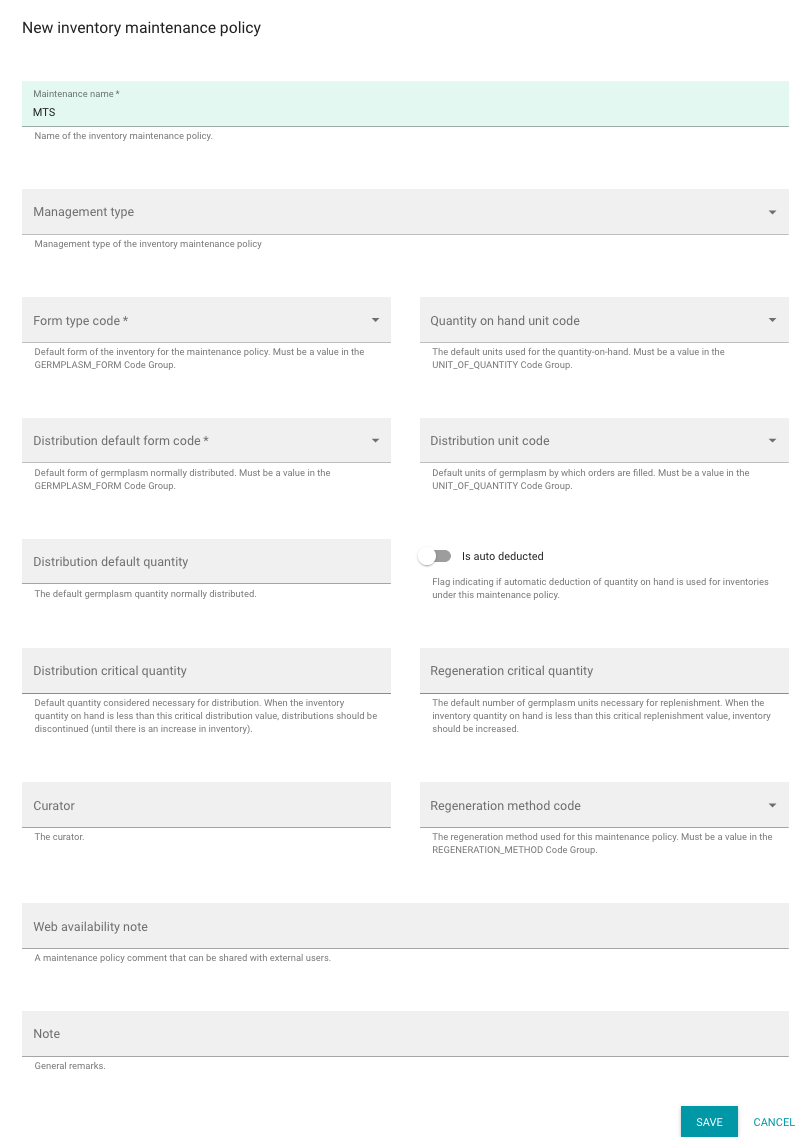
Inventory maintenance policies
An inventory maintenance policy determines how the germplasm will be managed in the genebank collection. Read more about maintenance polices.
The inventory maintenance policy is a mandatory field for creating inventories, so you must create at least one policy to work with inventories.
Follow these steps to create an inventory maintenance policy:
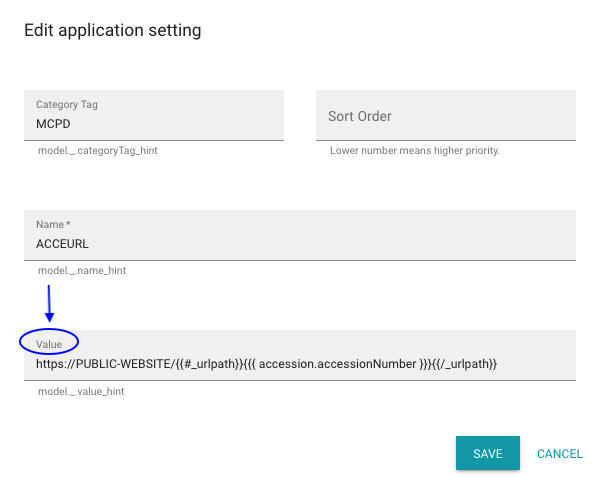
MCPD ACCEURL
GGCE is a system used internally at your genebank. The ACCEURL setting is a template link to your publicly accessible genebank portal where external users can find information about your accessions.
To update the ACCEURL, go to the Application settings area and select the ACCEURL row. Click or tap the actons button, select the Edit option to open the dialog where you can update the Value text box.
If you do not have a public website, please clear the value of this setting or remove the ACCEURL setting.